Table of Contents
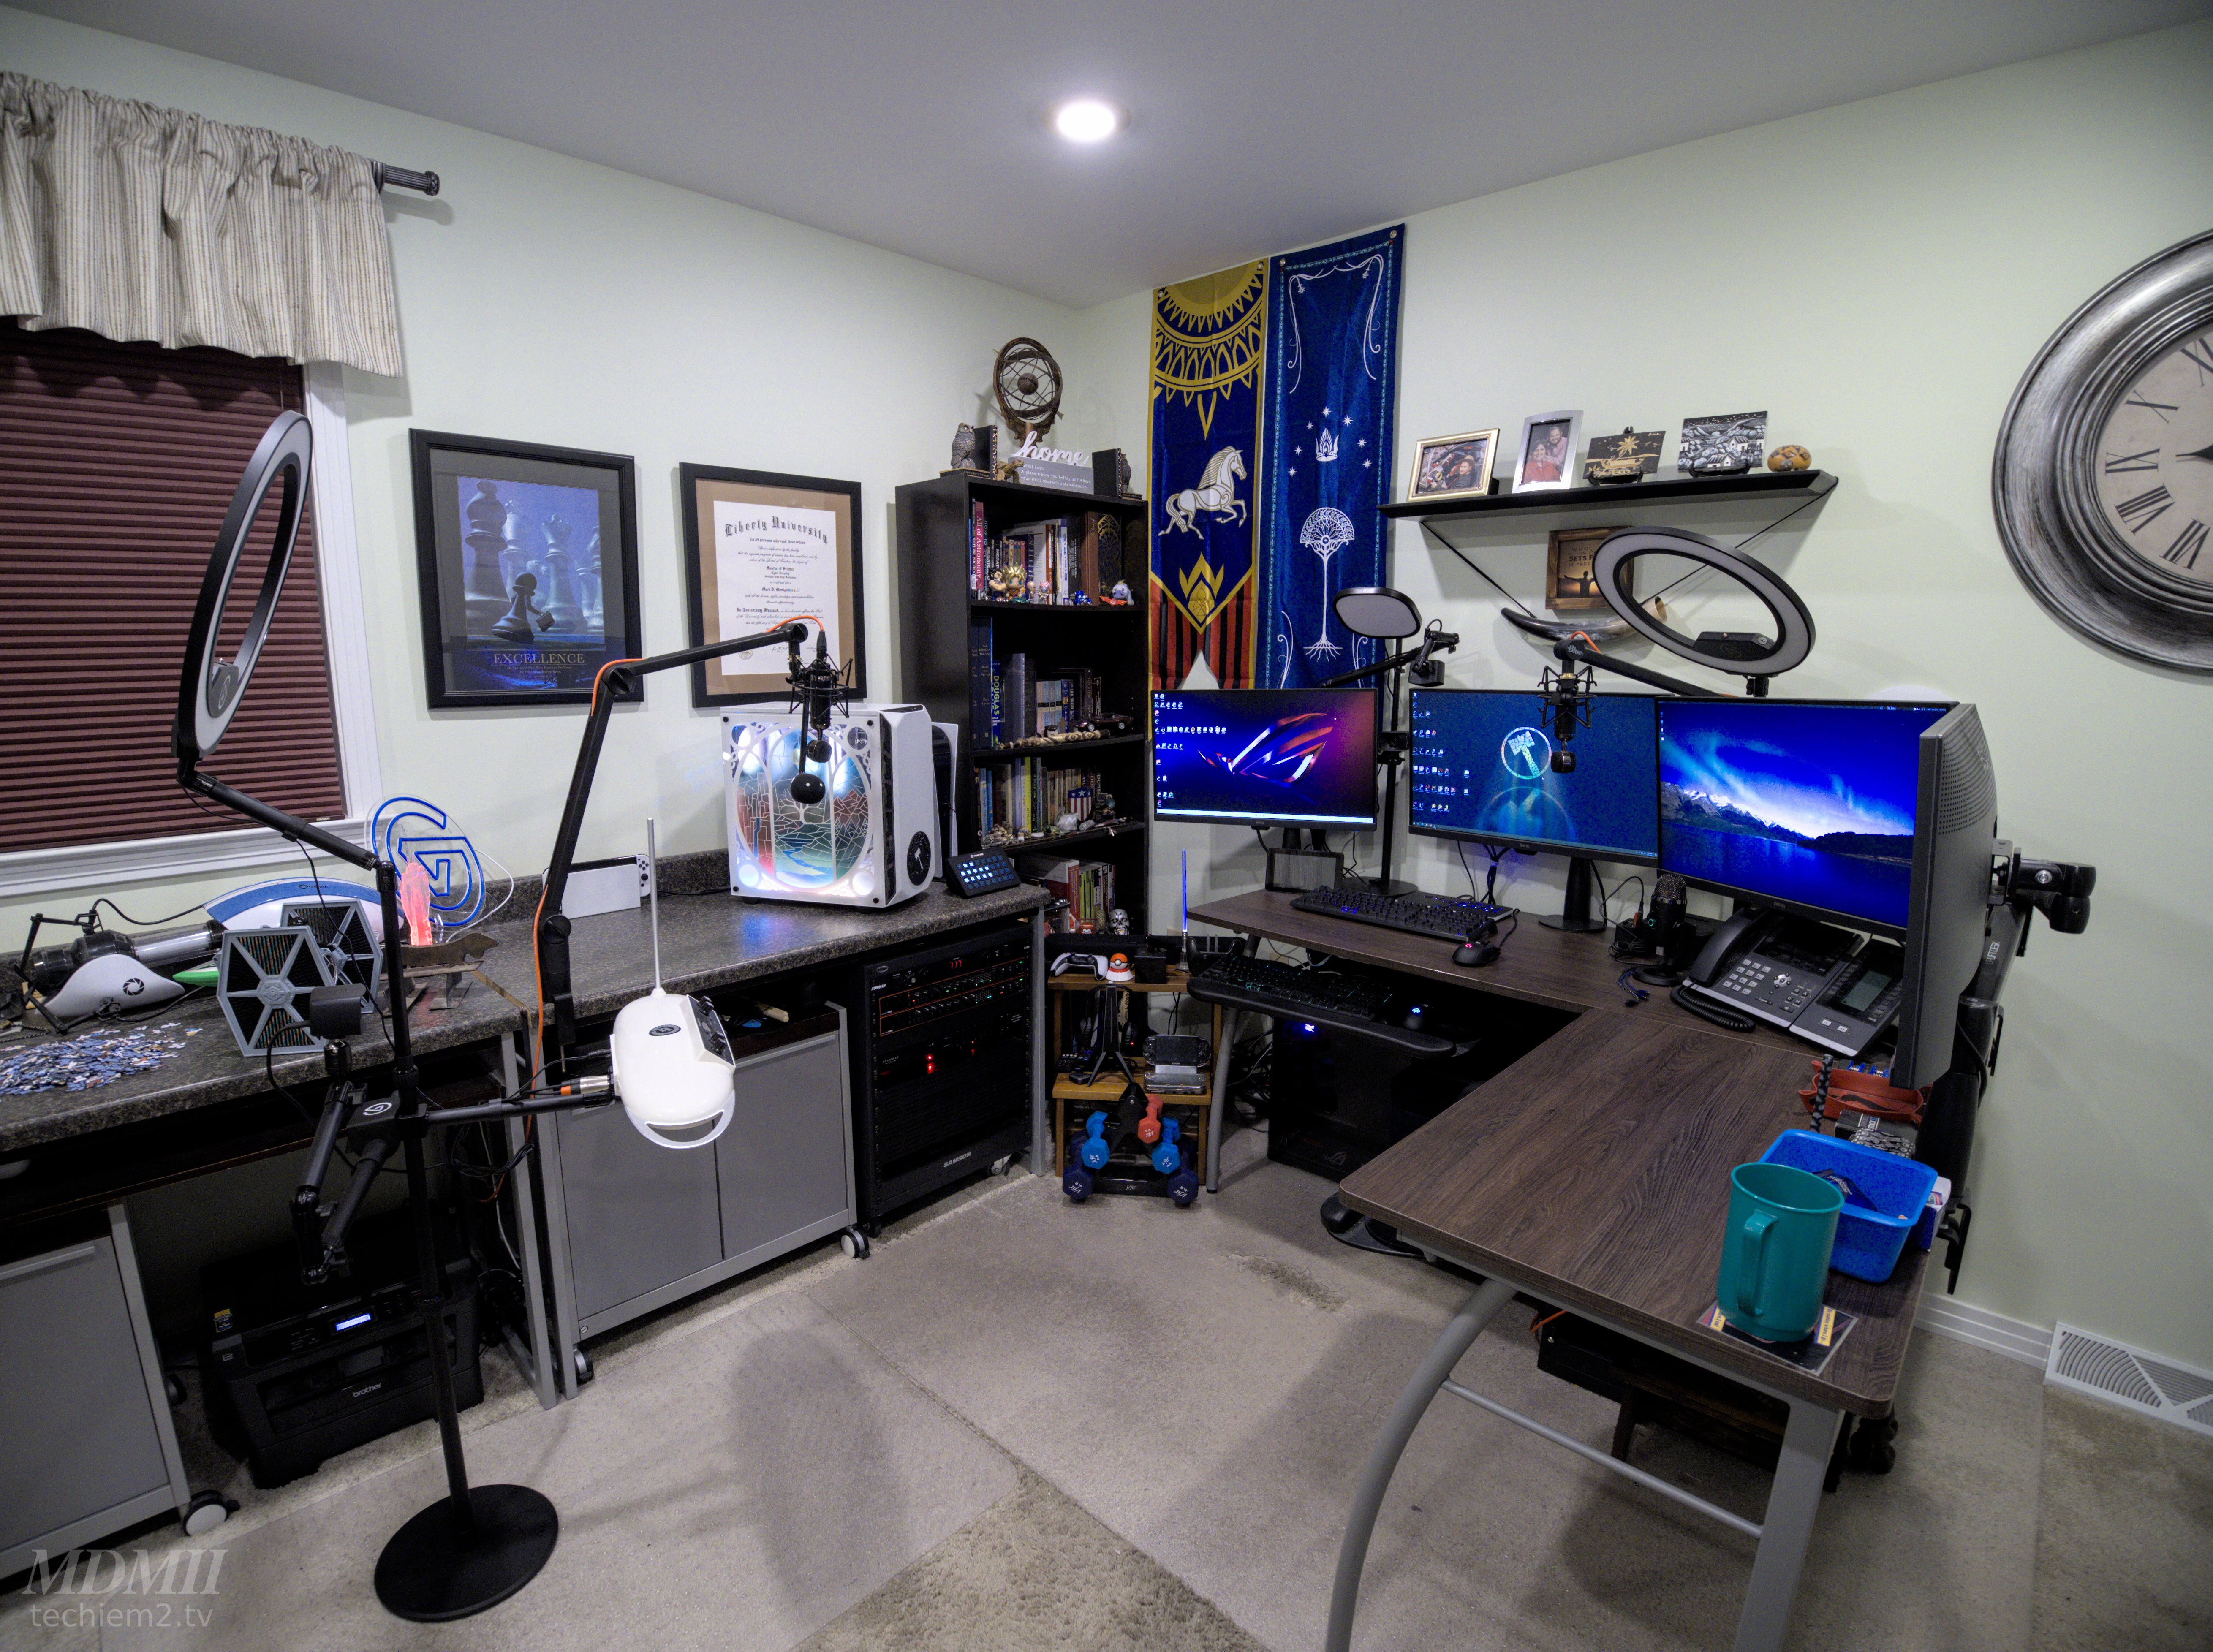
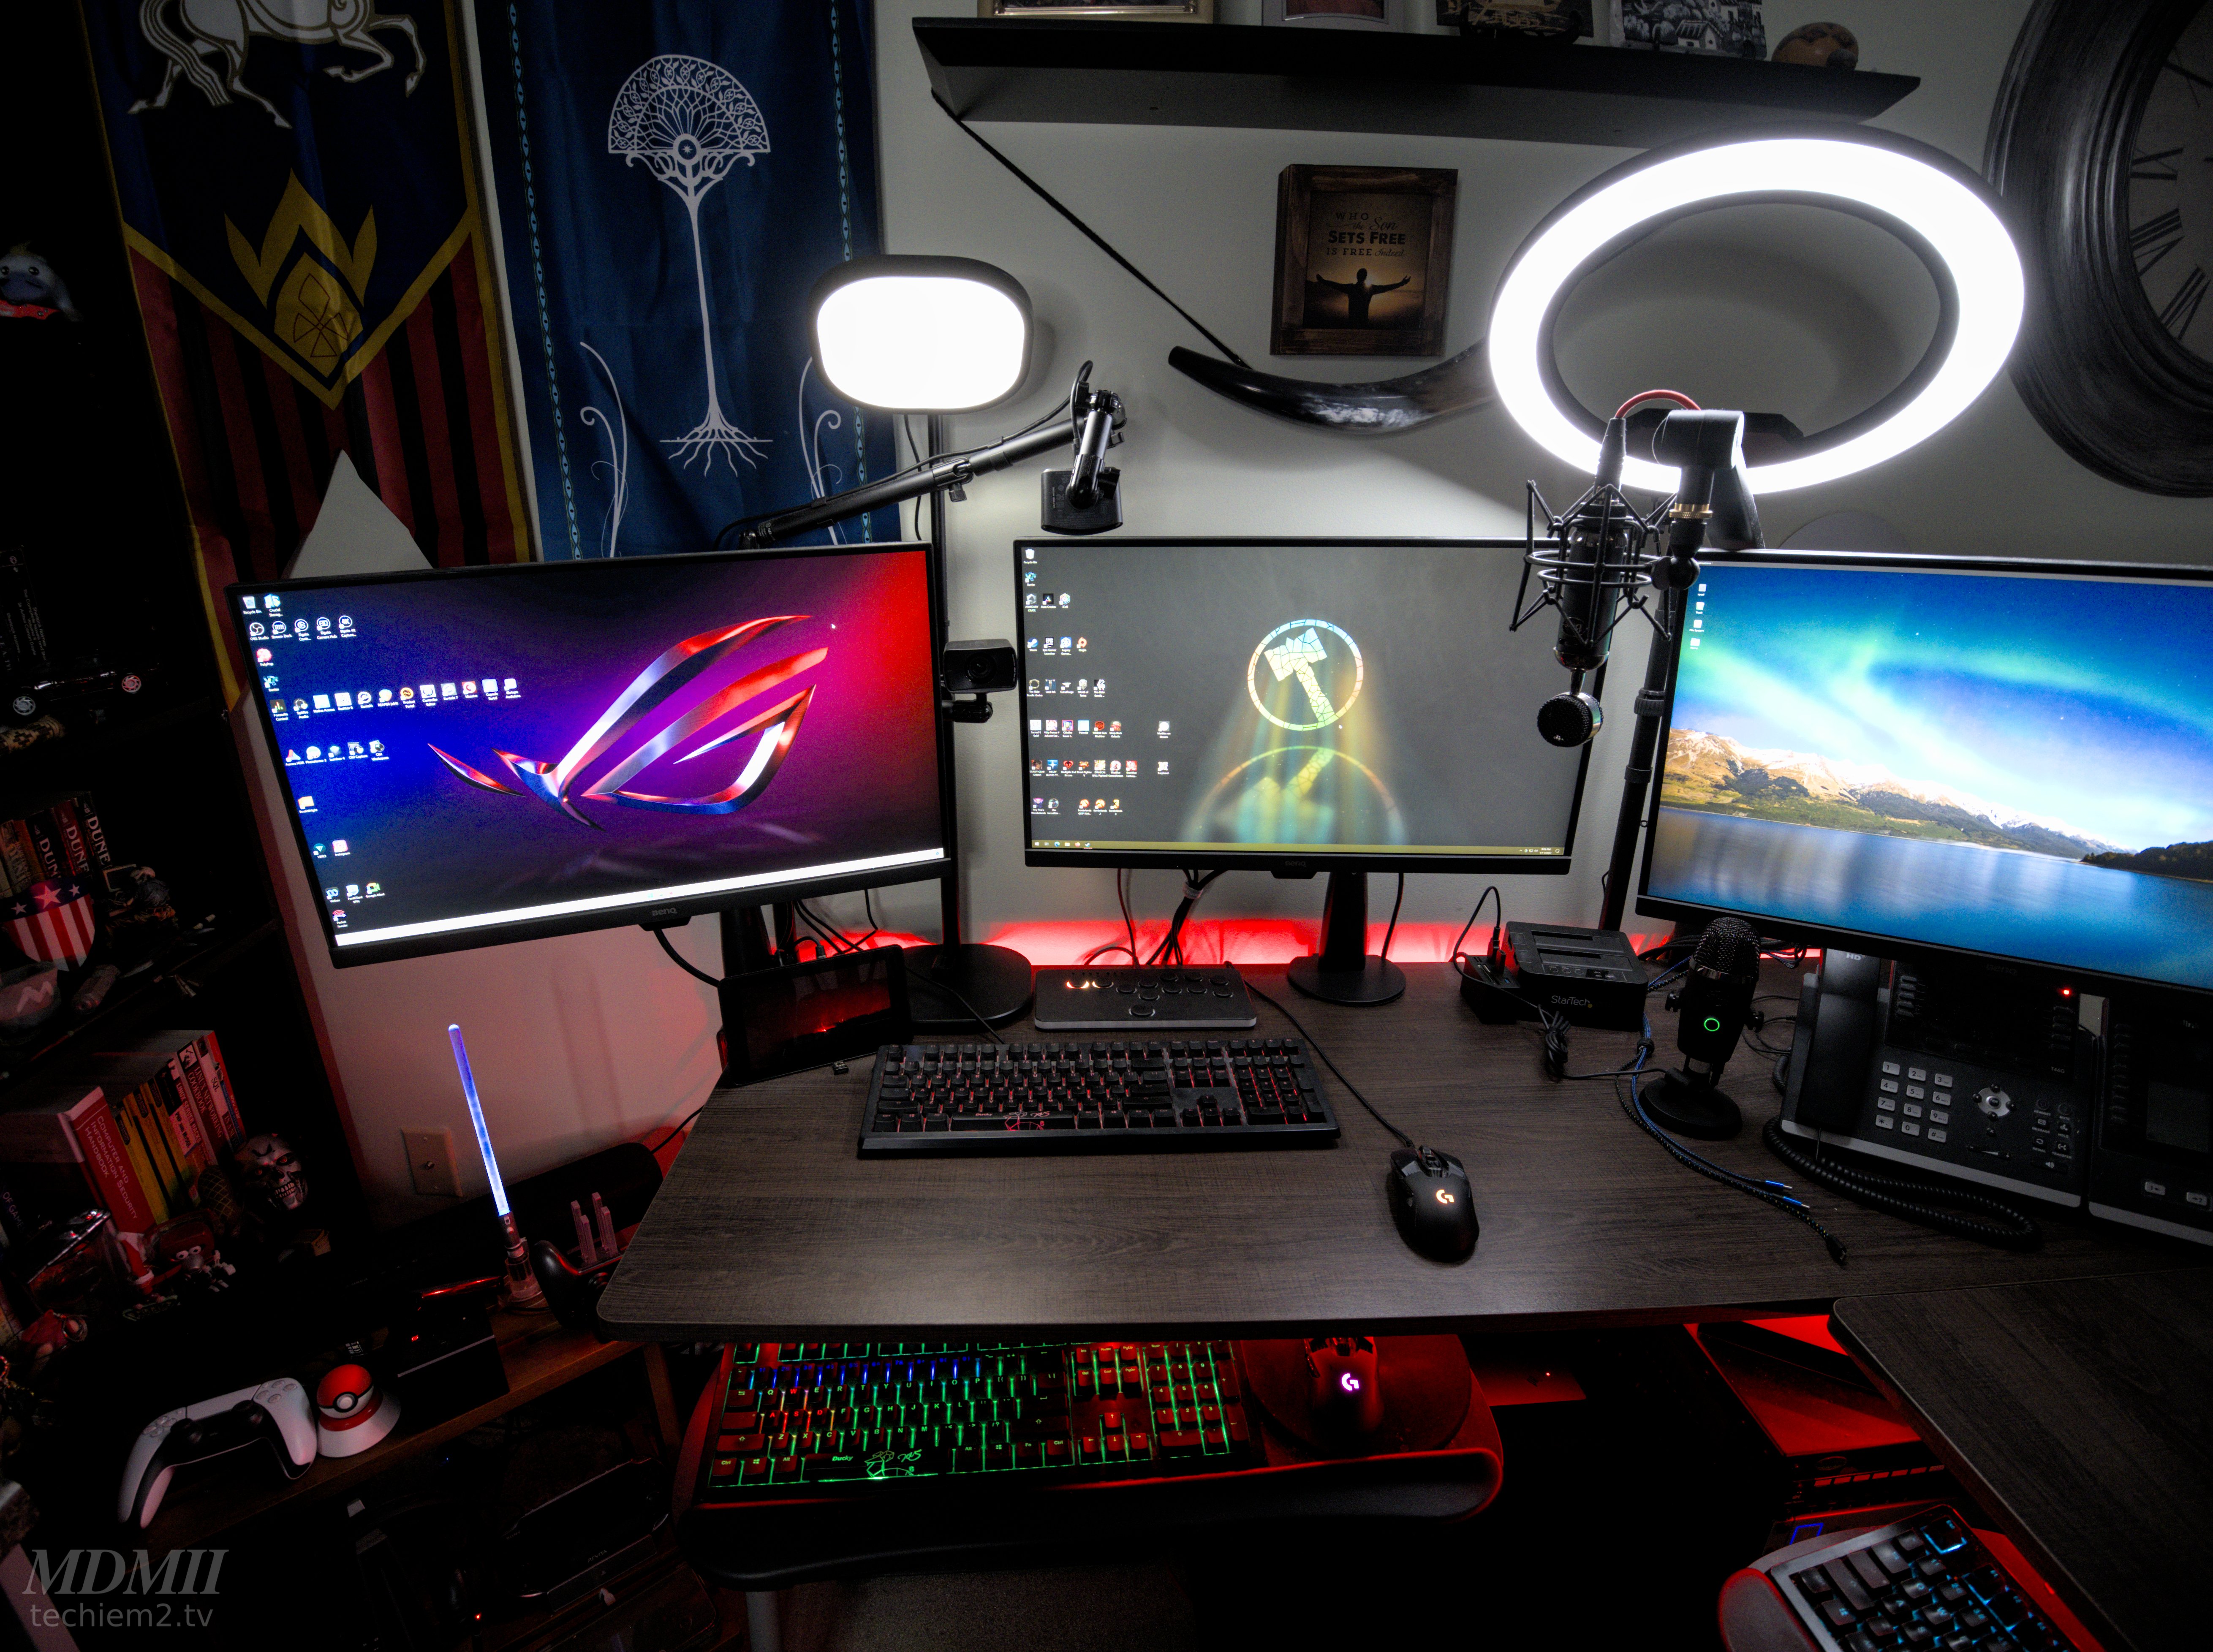
Studio and Streaming Setup
(Last Updated: 2023-01-14)
Anyone that knows me knows I tend to not do things the normal way.
This of course, includes my Studio and Streaming setup.
This is an overview and guide to how I do my Studio and Streaming setup.
Hopefully you will find something useful here, or at least get some entertainment from it.
Base Audio/Video Setup
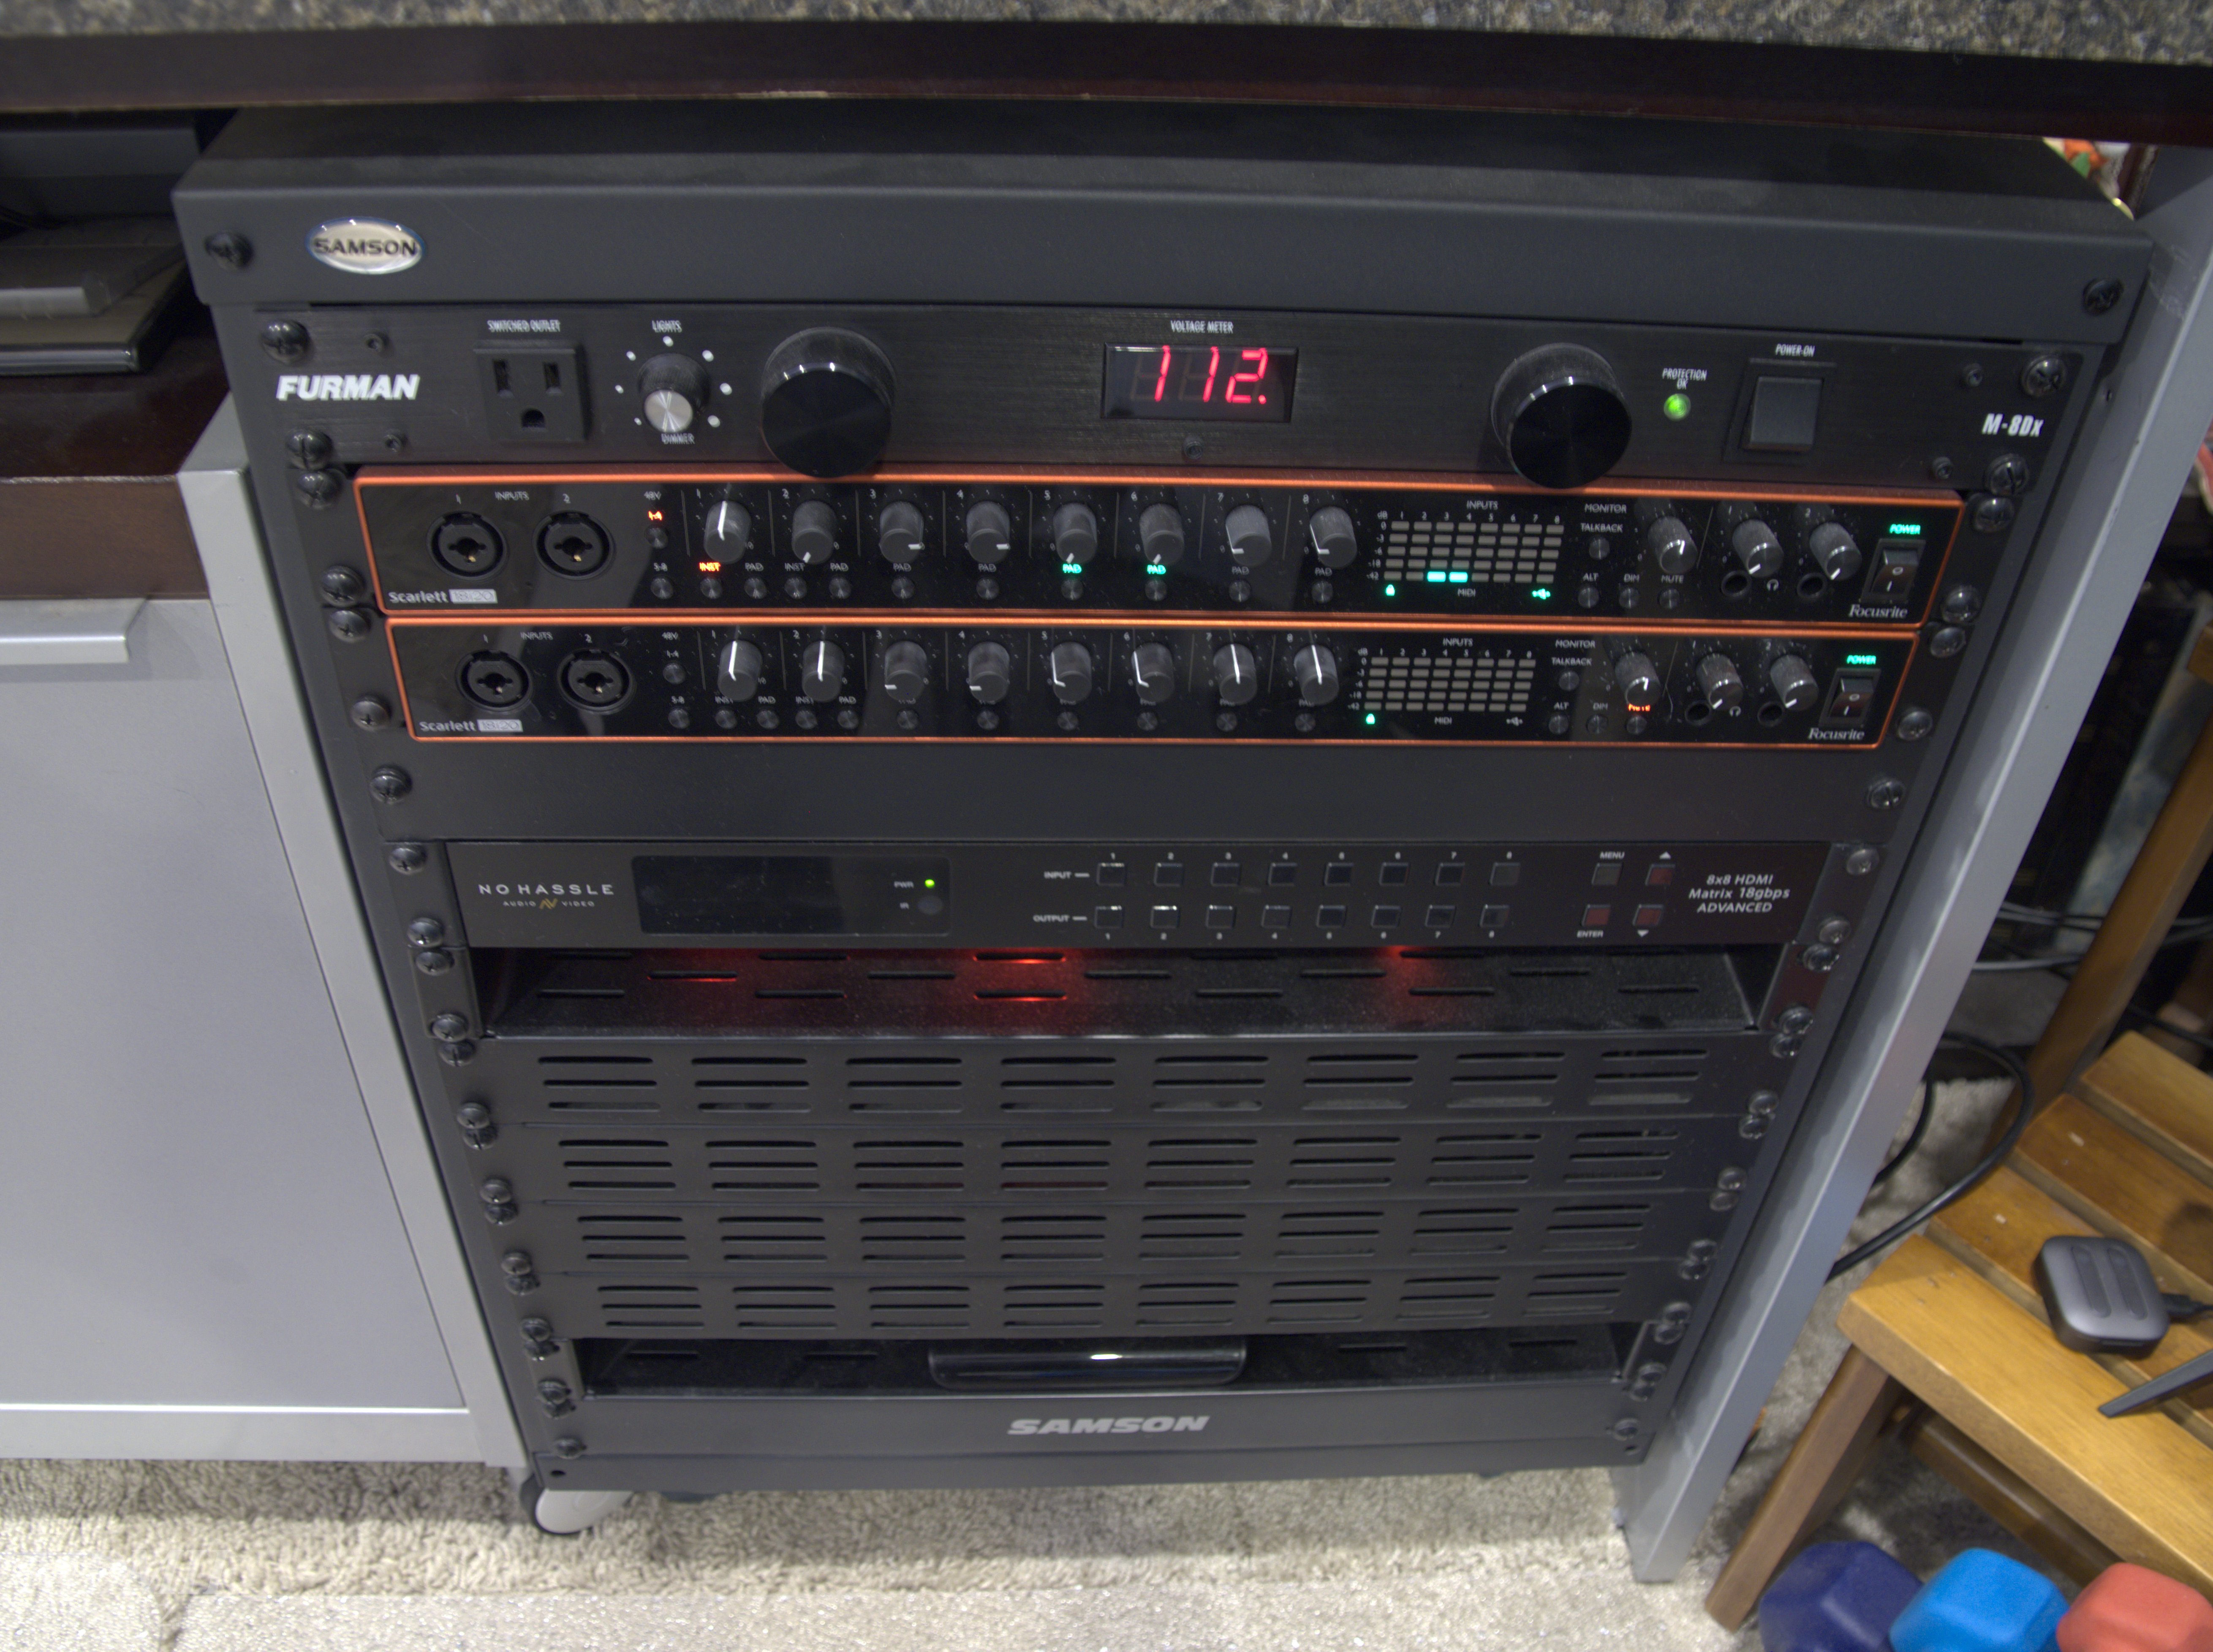
Core A/V System Components
No Hassle AV 8×8 4k HDMI Matrix Switch
Digital to Analog Converter (3)
Focusrite Scarlett 18i20 Audio Interface (2)
Bluetooth Transmitter
Instruments
Moog Theremini
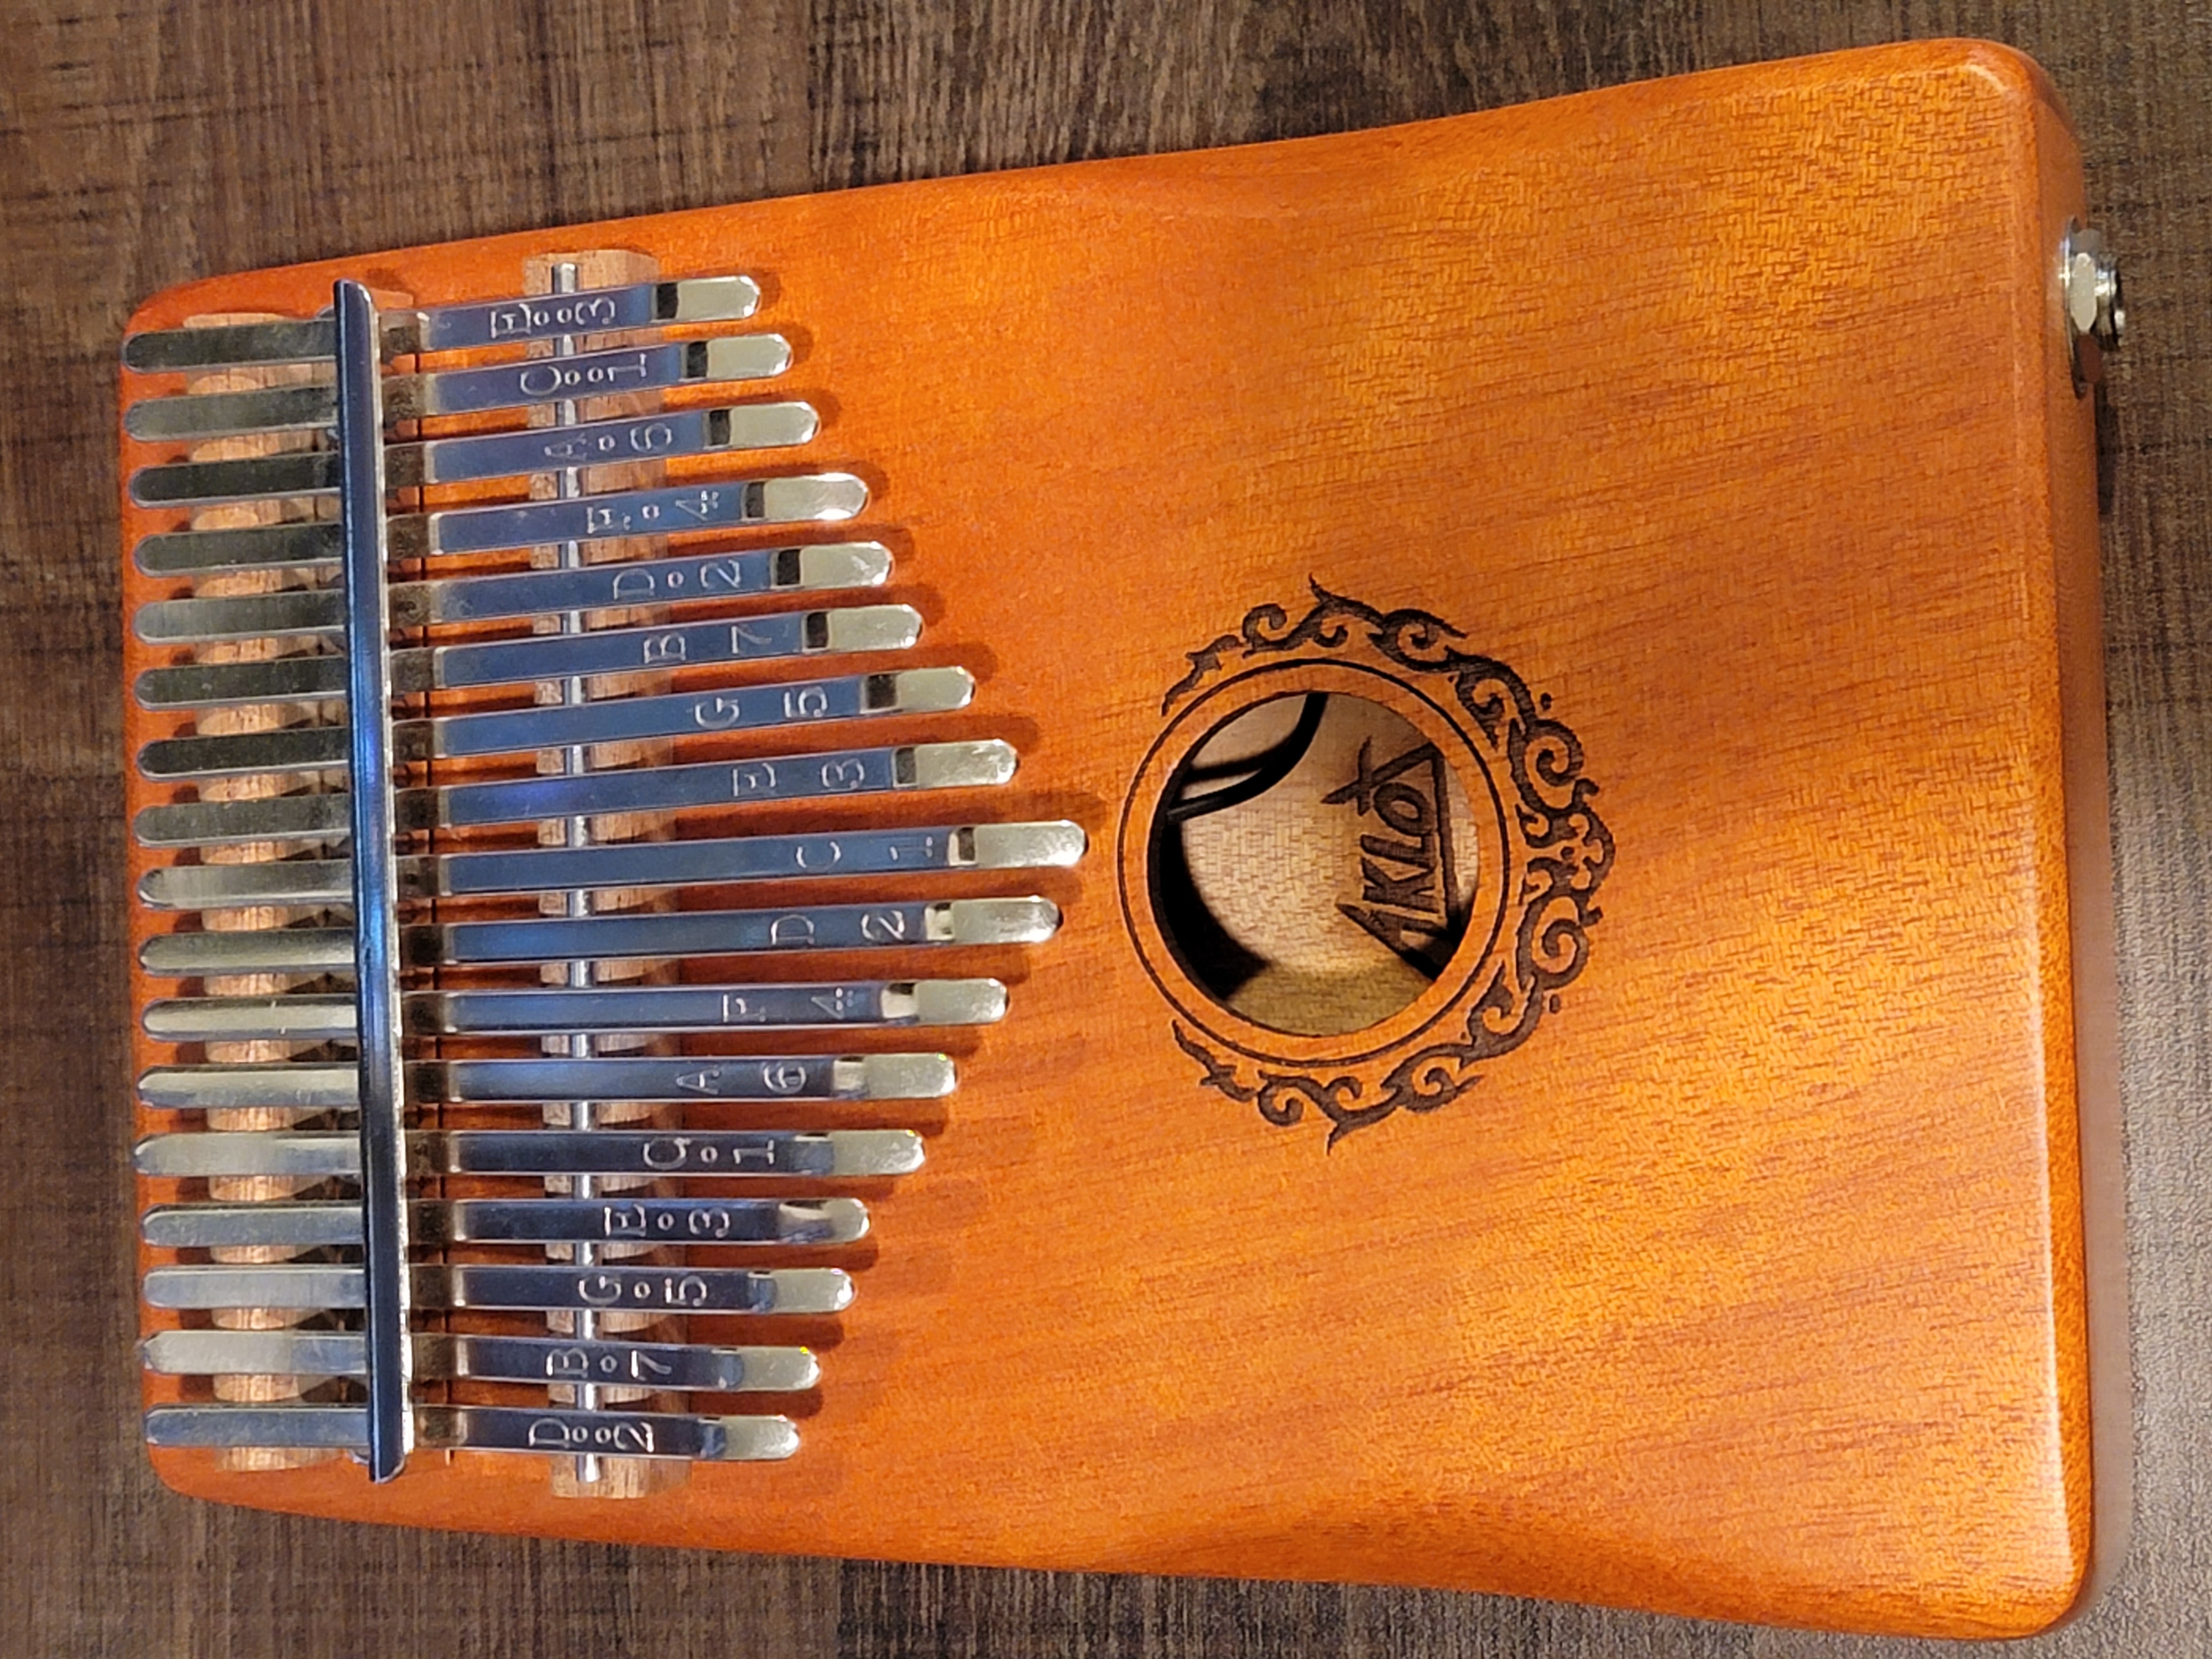
Aklot Kalimba (17 key)
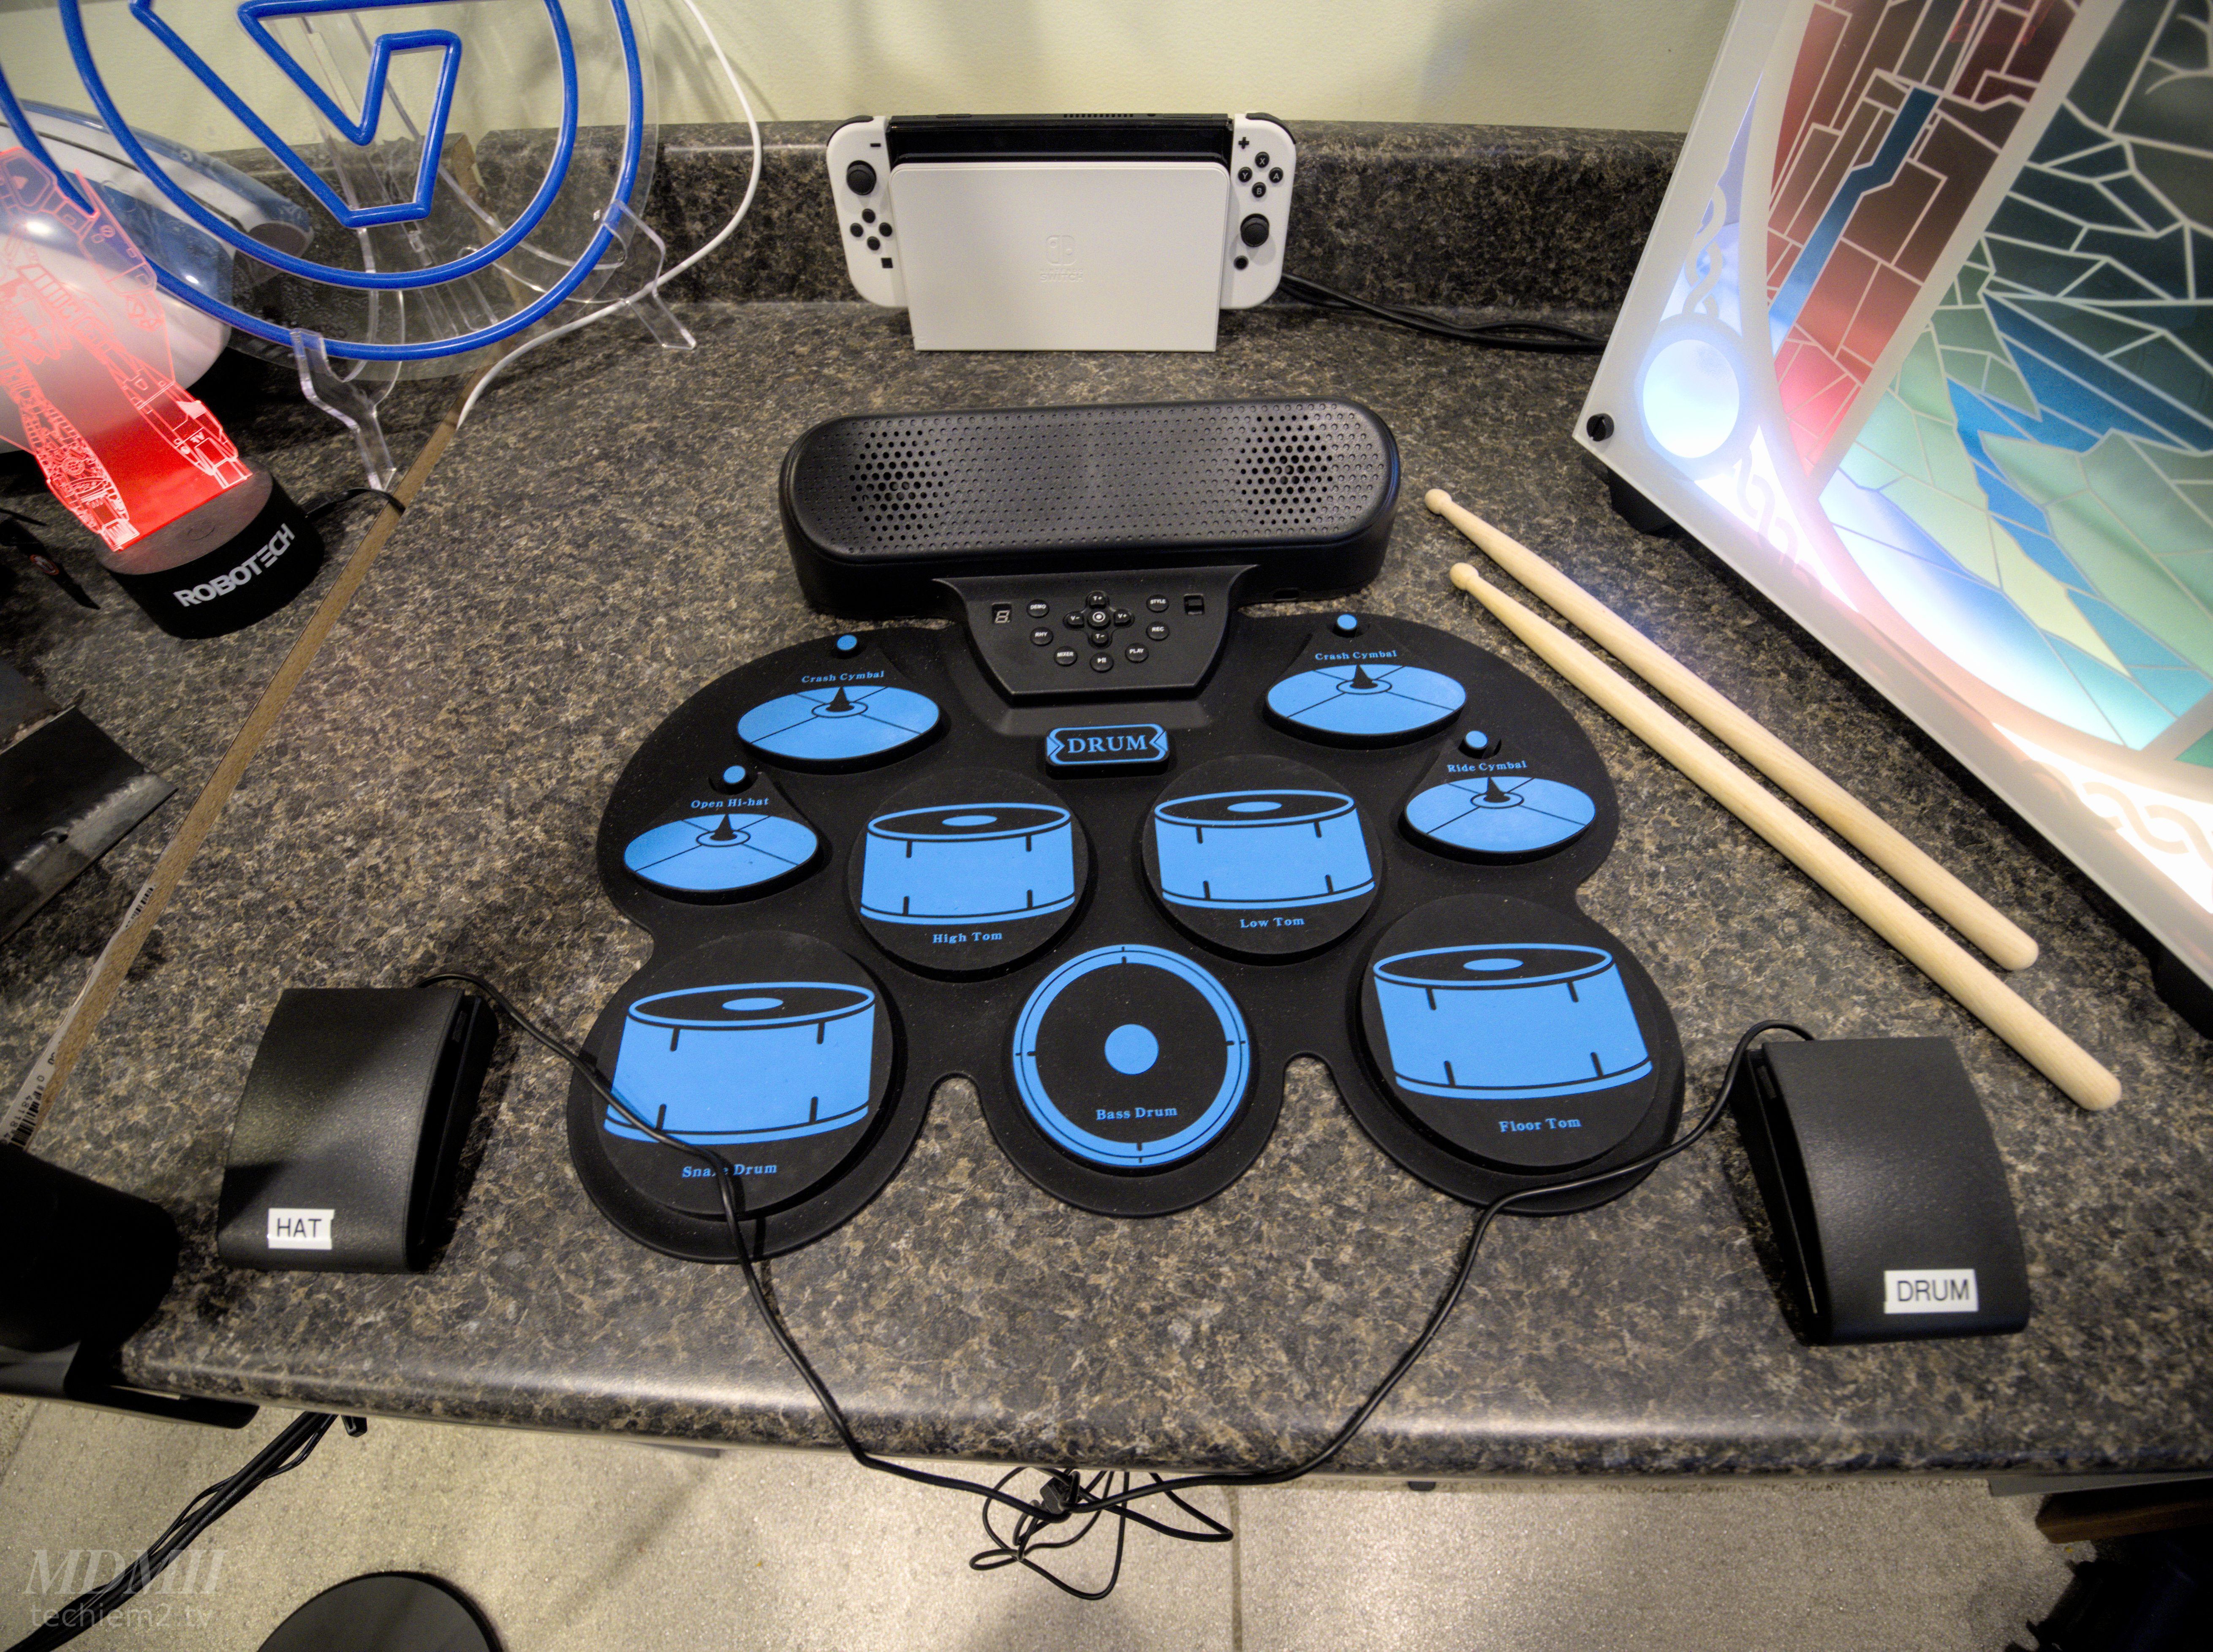
DAUSROOB WG101 Electronic Drum Set
Otamatone
Microphones
Blue Blackout Spark SL (2)
Speakers/Headphones
BLU Aria Pod+ Bluetooth Earbuds
Skullcandy Riff Bluetooth Headset
Yamaha SR-C20A Soundbar
Video Routing
HDMI Matrix Switch Input Configuration
Input 1: Streaming/Production PC
Input 2: Gaming PC
Input 3: Workstation Second Output - HDMI Output
Input 4: Nintendo Switch
Input 5: Sony Playstation 5
Input 6: Amazon Fire Cube
Input 7: Roku Premier
Input 8: Extra Line for temporary devices
HDMI Matrix Switch Output Configuration
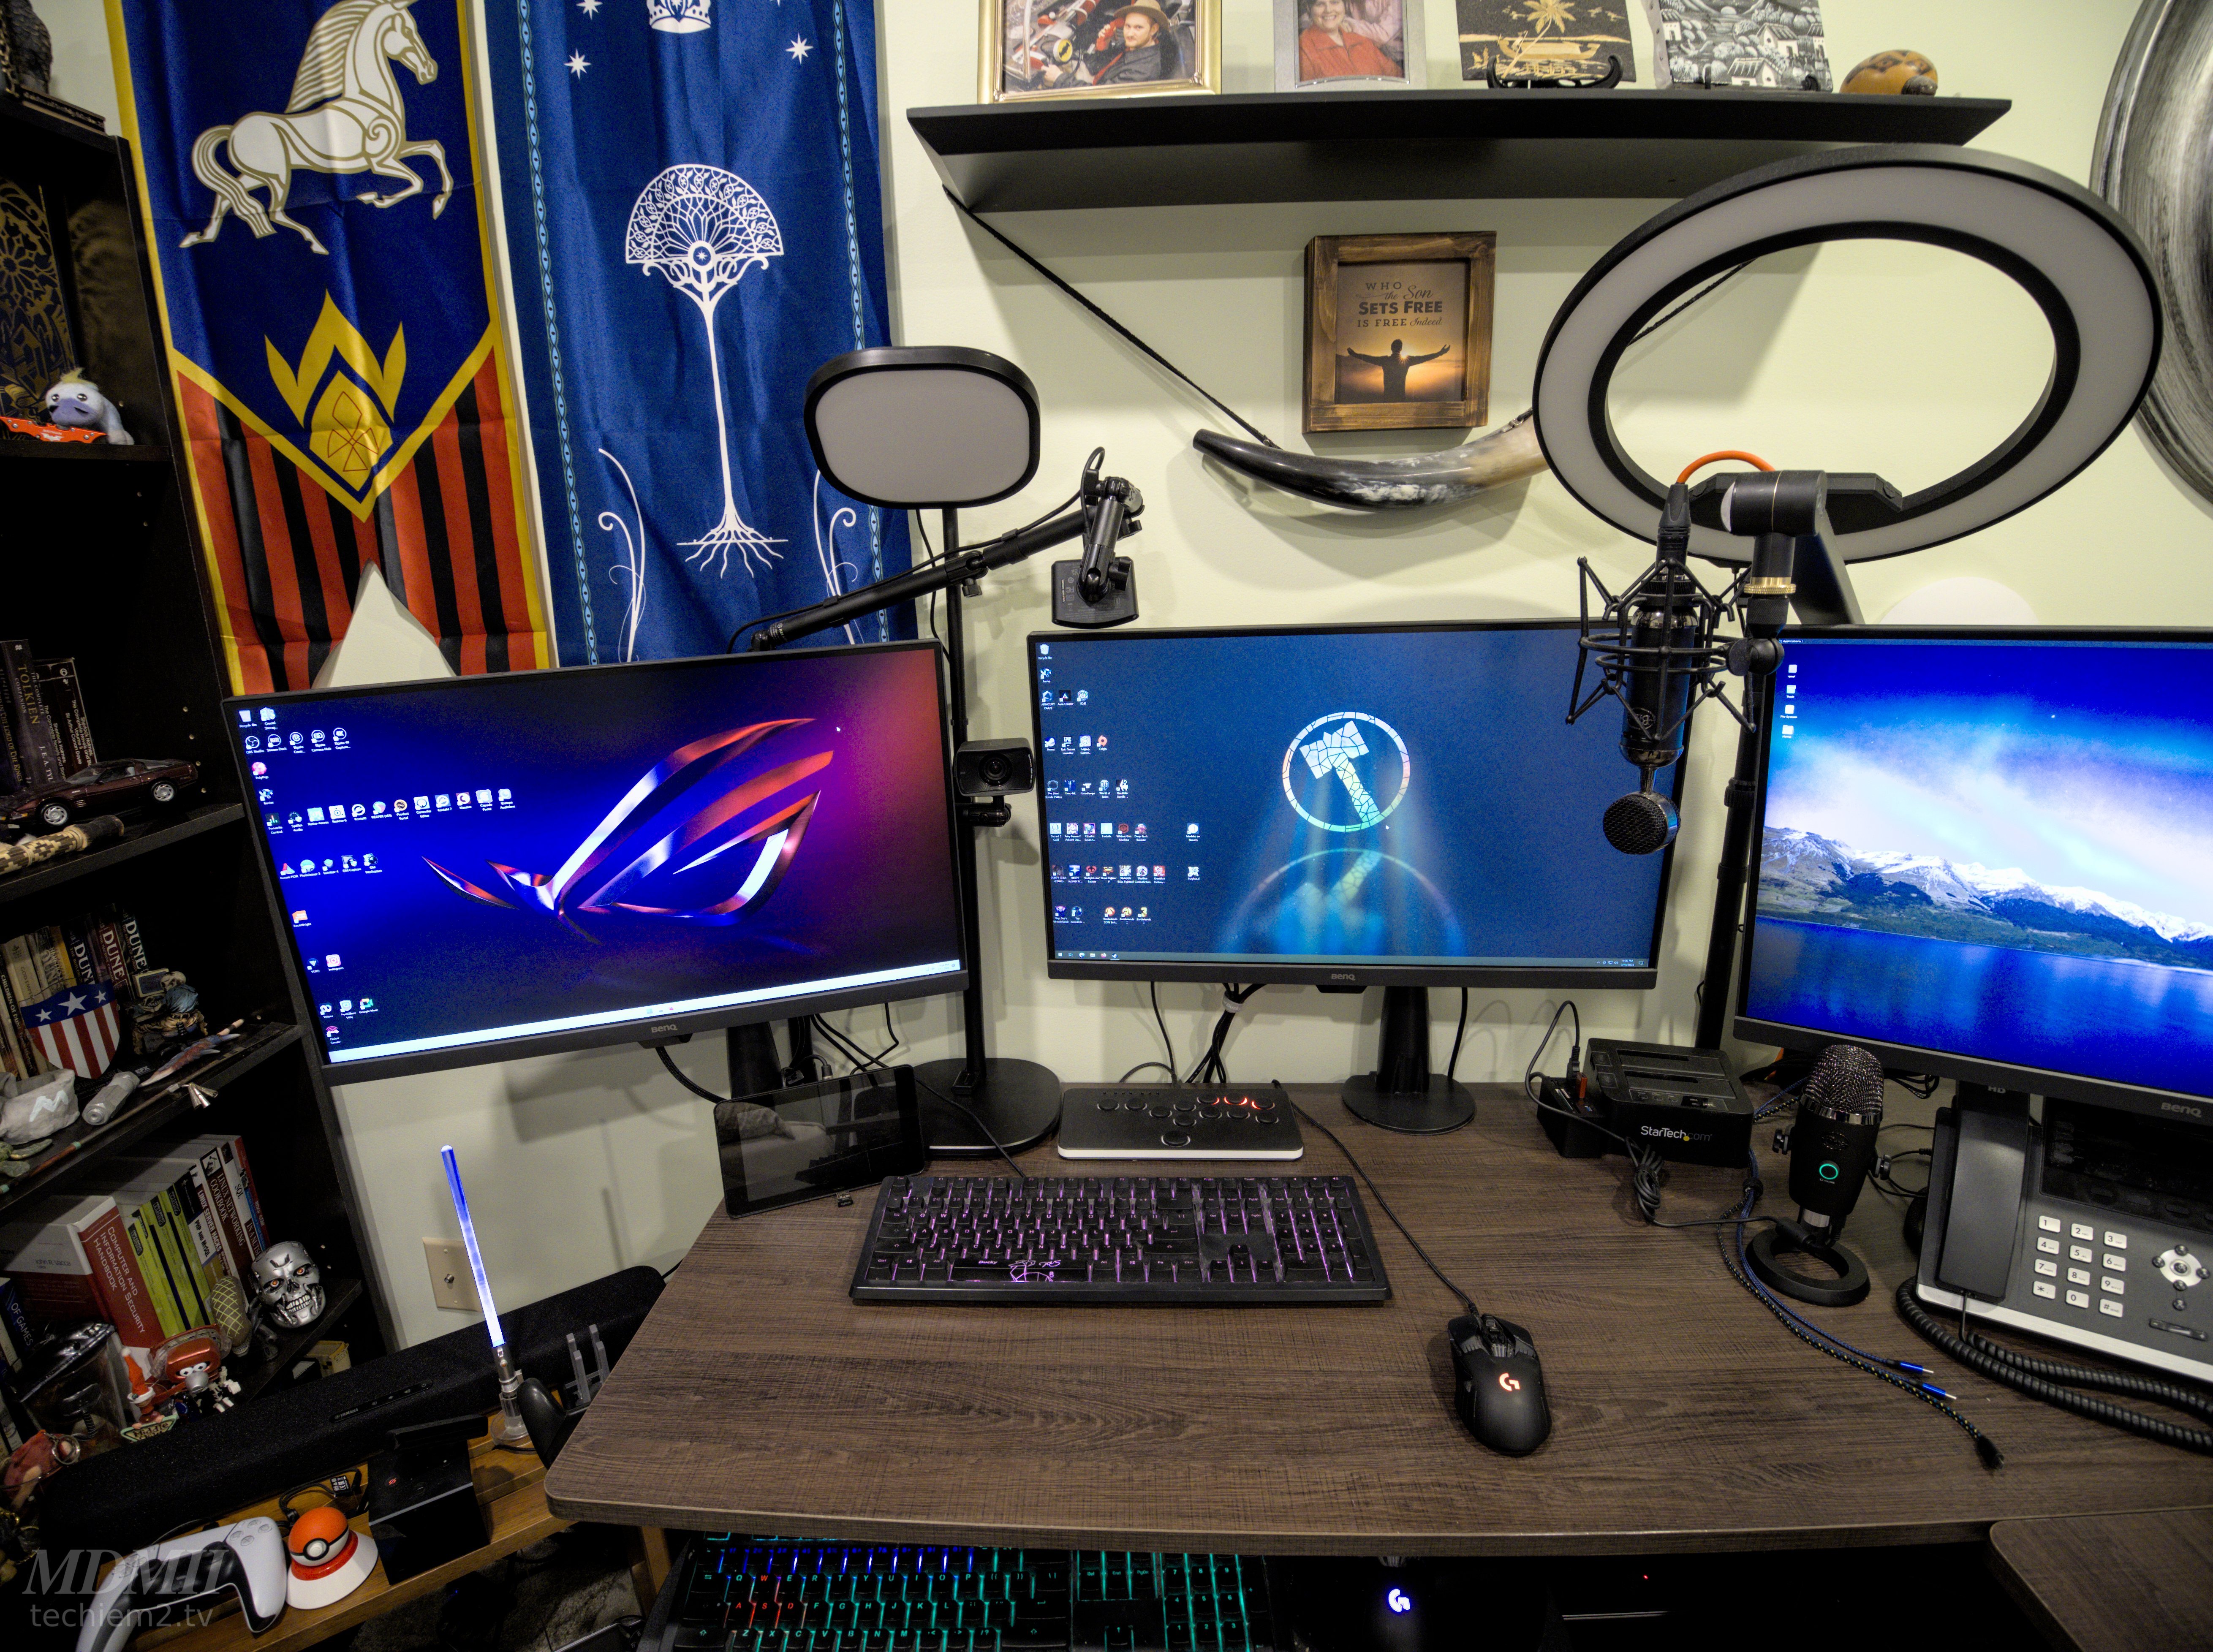
Output 1: BenQ PD2700U 27” 4K Designer Monitor
Output 2: BenQ PD2700U 27” 4K Designer Monitor
Output 3: BenQ PD2700U 27” 4K Designer Monitor
Output 4: BenQ PD2700U 27” 4K Designer Monitor
Output 8: Elgato 4K60 Pro MK.2 in Streaming/Production PC
Monitors 1 and 2 are frequently changed between devices, as these are used for the Streaming/Production and Gaming PCs, consoles, etc.
Monitor 3 is almost always the second monitor for the Workstation.
Monitor 4 is almost always the first monitor for the Workstation, which connects directly to this monitor via displayport.
The Elgato 4K60 Pro MK.2 is installed in the Streaming/Production PC for capturing whatever source is needed for recording/streaming.
This lets me capture any source on the Matrix Switch.
I have the Matrix Switch output to the Elgato 4K60 Pro MK.2 scaled down to 1080p in the switch since for some reason I haven't figured out yet the card won't accept the 4k signal from the Gaming PC (although it does from everything else).
Audio Routing
Scarlett 1 Input Configuration
Channels 1/2: Usually blank, 1 is occasionally used with Kalimba.
Channels 3/4: Blue Blackout Spark SL Microphones
Channels 5/6: Moog Theremini
Channels 7/8: Raspberry Pi running OpenElec
ADAT In: ADAT Out from Scarlett 2
Scarlett 1 Output Configuration
Line Out 1/2: All but Inputs 3/4 out to Bluetooth Transmitter
Line Out 3/4: All but Inputs 3/4 out to Speakers
Line Out 7/8 (linked to front headphone out 1): Channels 3/4 to direct monitor microphones.
Line Out 9/10 (linked to front headphone out 2): Channels 5/6 to direct monitor Theremini
Scarlett 2 Input Configuration
Channels 1/2: Blank
Channels 3/4: DAC 1
Channels 5/6: DAC 2
Channels 7/8: DAC 3
Scarlett 2 Output Configuration
ADAT Out: Channels 1-8 out to Scarlett 1.
Scarlett 1 is connected to the Streaming/Production PC via USB so the microphones and instruments are available as audio sources for streaming/recording.
Scarlett 2 is not connected to USB since it is only feeding device audio to Scarlett 1 for playback, and there is currently no need to expose its channels to the PC for capture.
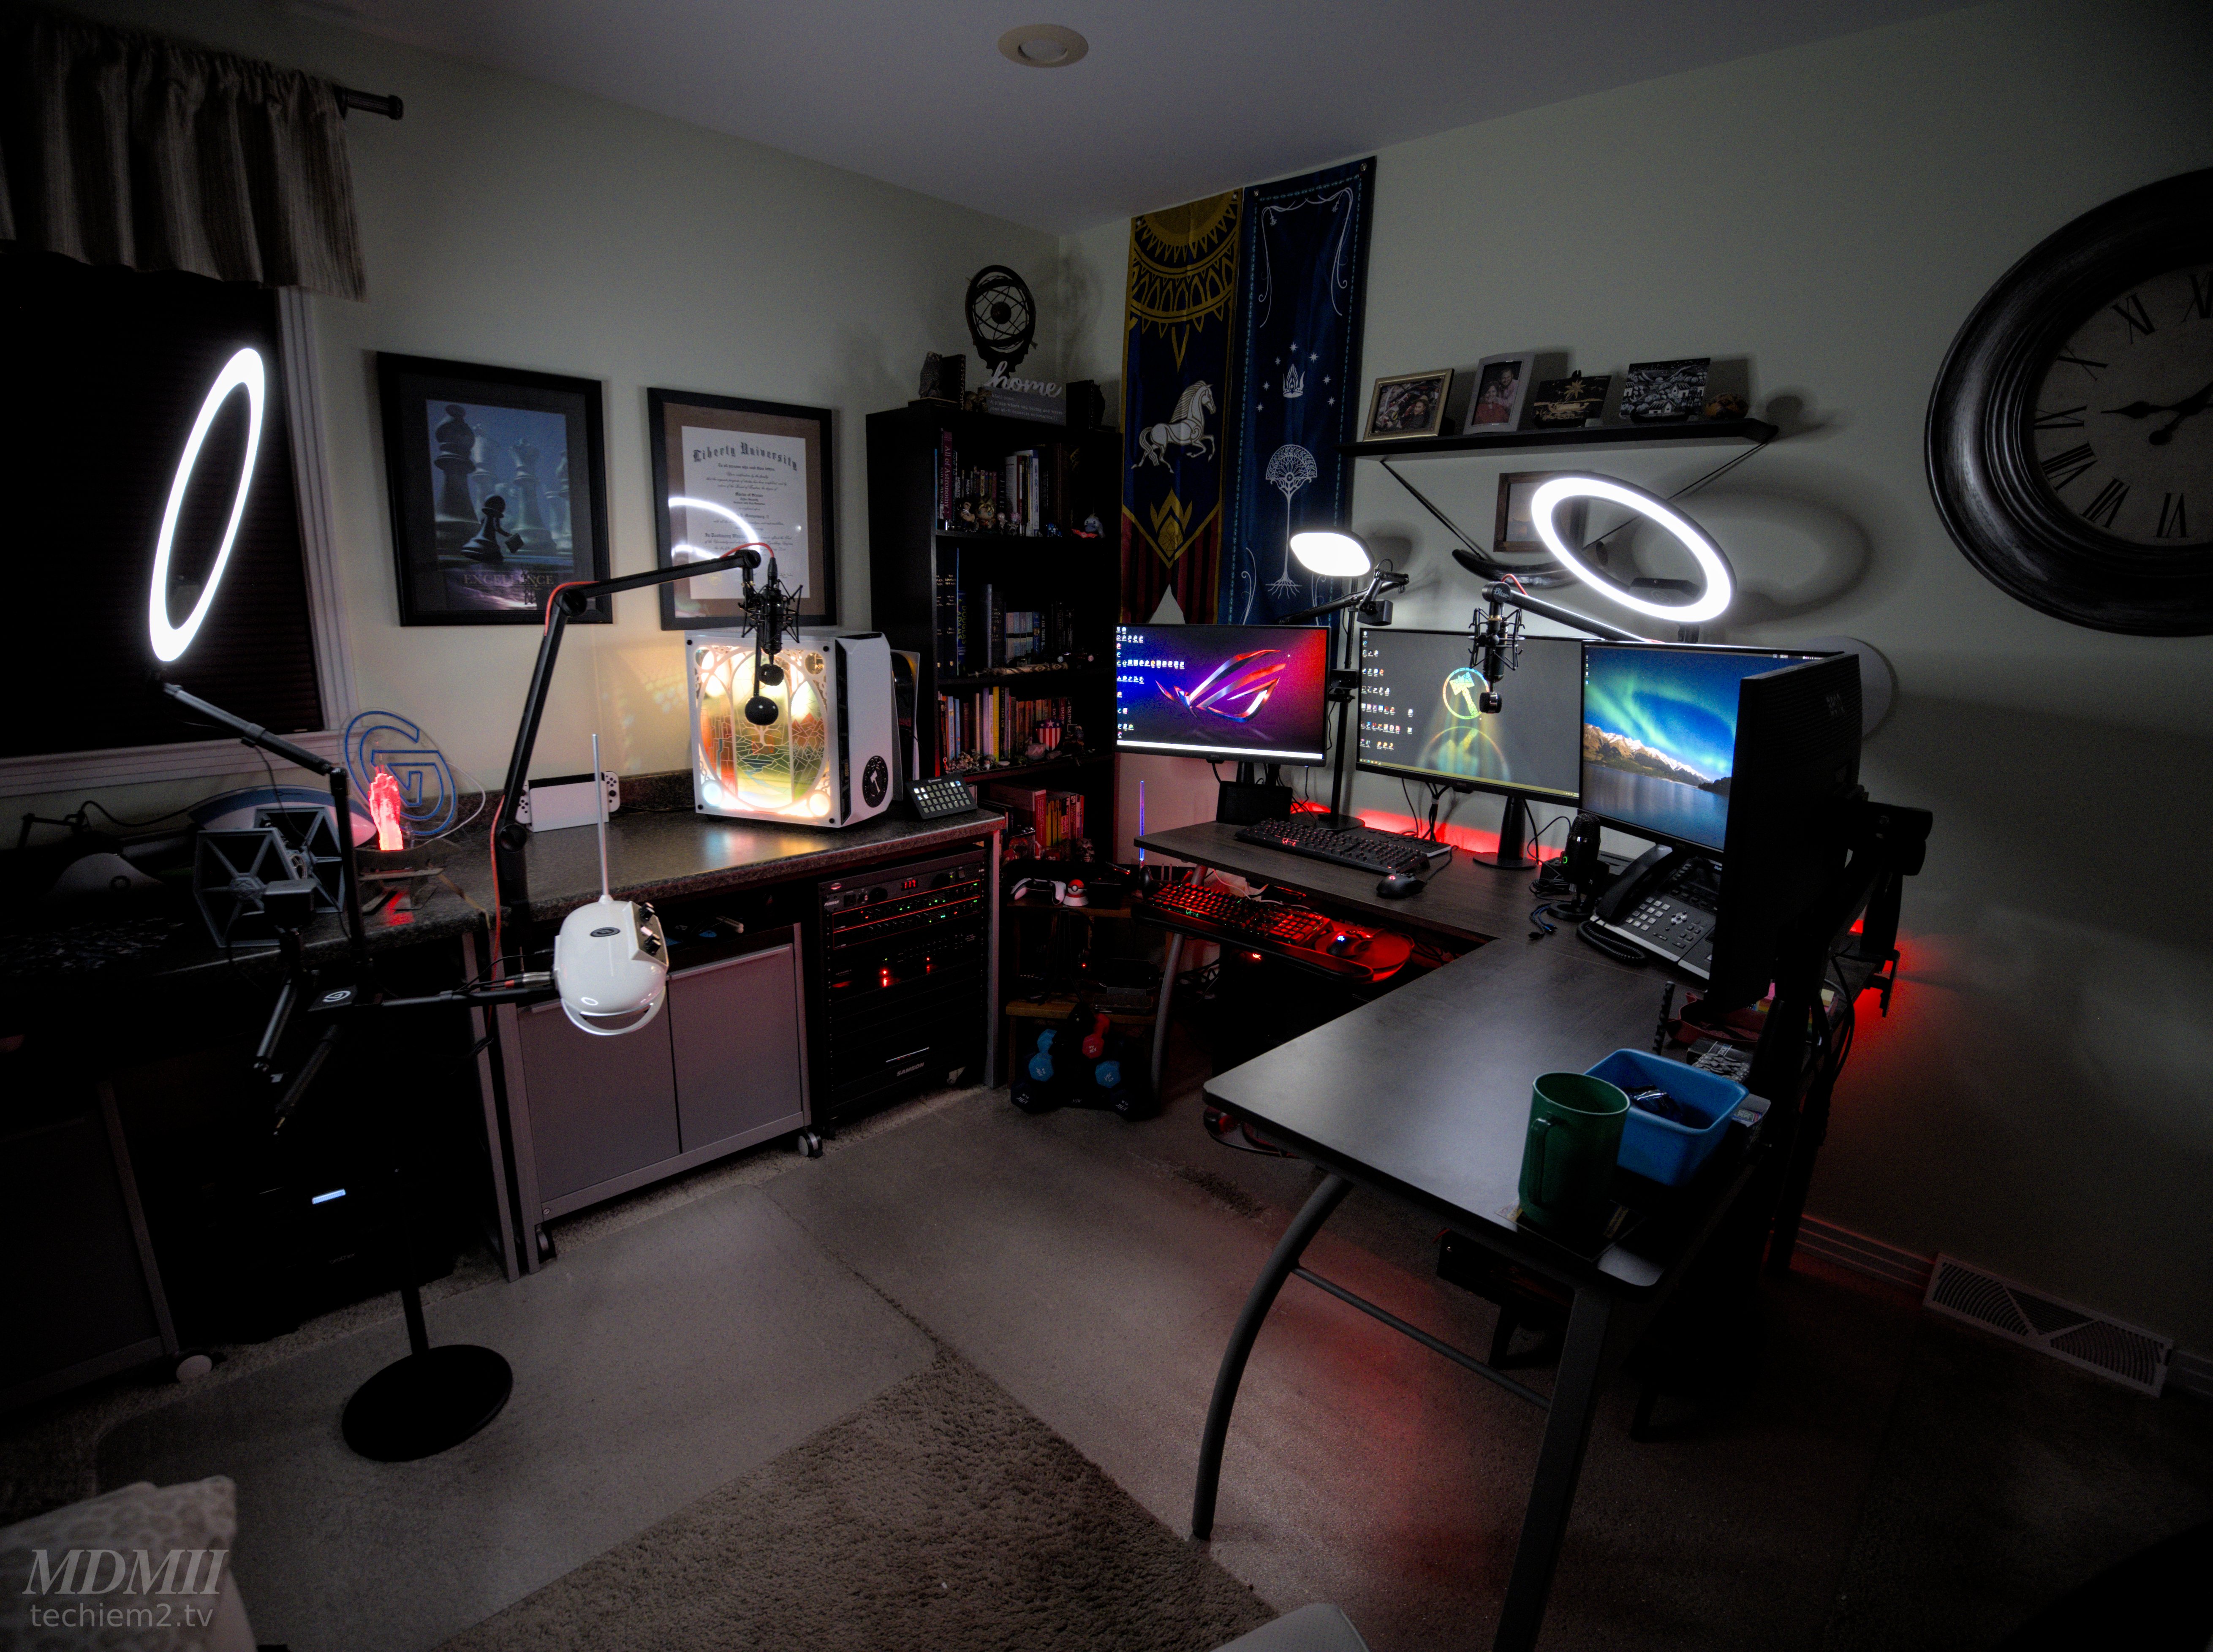
Lighting and Video Setup
My room has two rows of recessed lighting. This works for day to day work, but is too harsh for streaming or video recording.
Lighting
The area lighting consists of 1 Elgato Key Light Air, 2 Elgato Ring Lights, 2 Elgato Light Strips, plus any light put off by monitors/keyboards/desktop toys/etc.
The Key Light Air is raised between Monitor 1 and Monitor 2 to give front lighting for PC Streaming, light for top down camera shots, and back lighting for Studio Streaming.
One Ring Light is raised between Monitor 2 and Monitor 3 to give front lighting for PC streaming and back lighting for Studio streaming.
The other Ring Light is mounted behind the Theremini to provide front lighting for Studio streaming and back lighting for PC streaming.

Video
Video recording/streaming is done by 3 Elgato Facecams.
One is mounted on an arm between Monitor 1 and Monitor 2.
One is mounted on a flex arm above Monitor 2 for overhead or larger room streaming.
The other is mounted on an arm just behind the Theremini.
Workflow and Control
PCs
Gaming PC
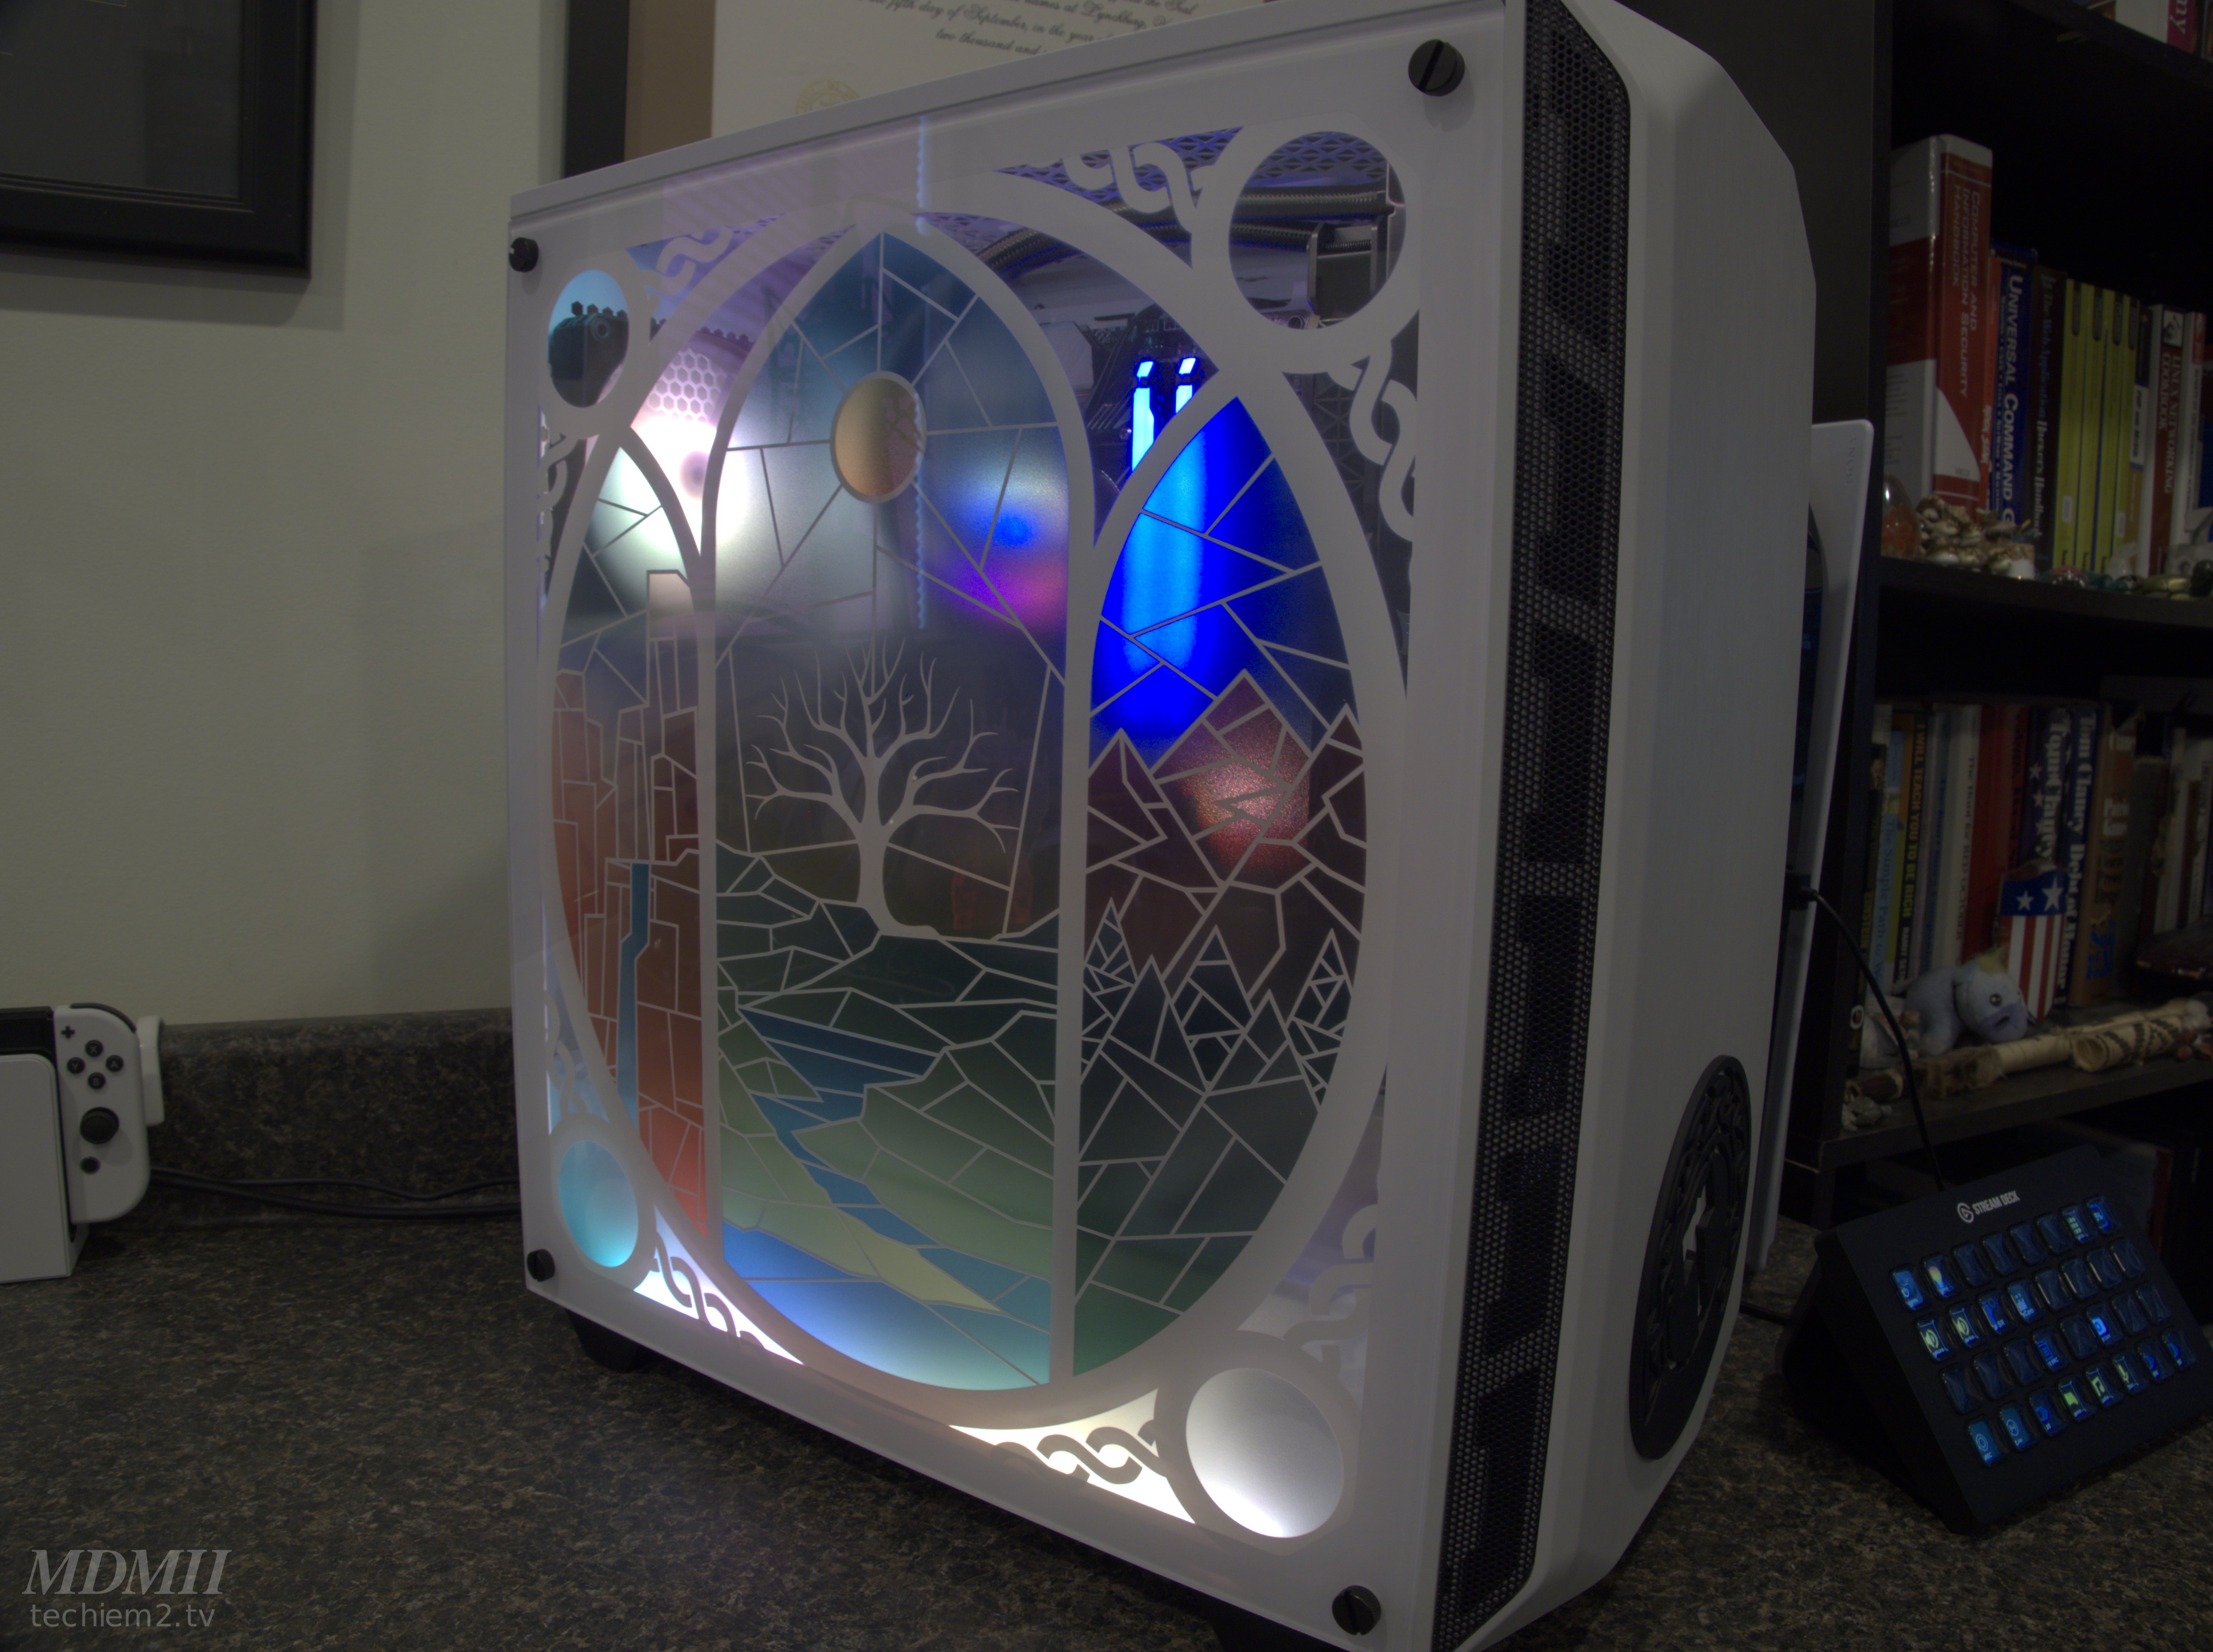
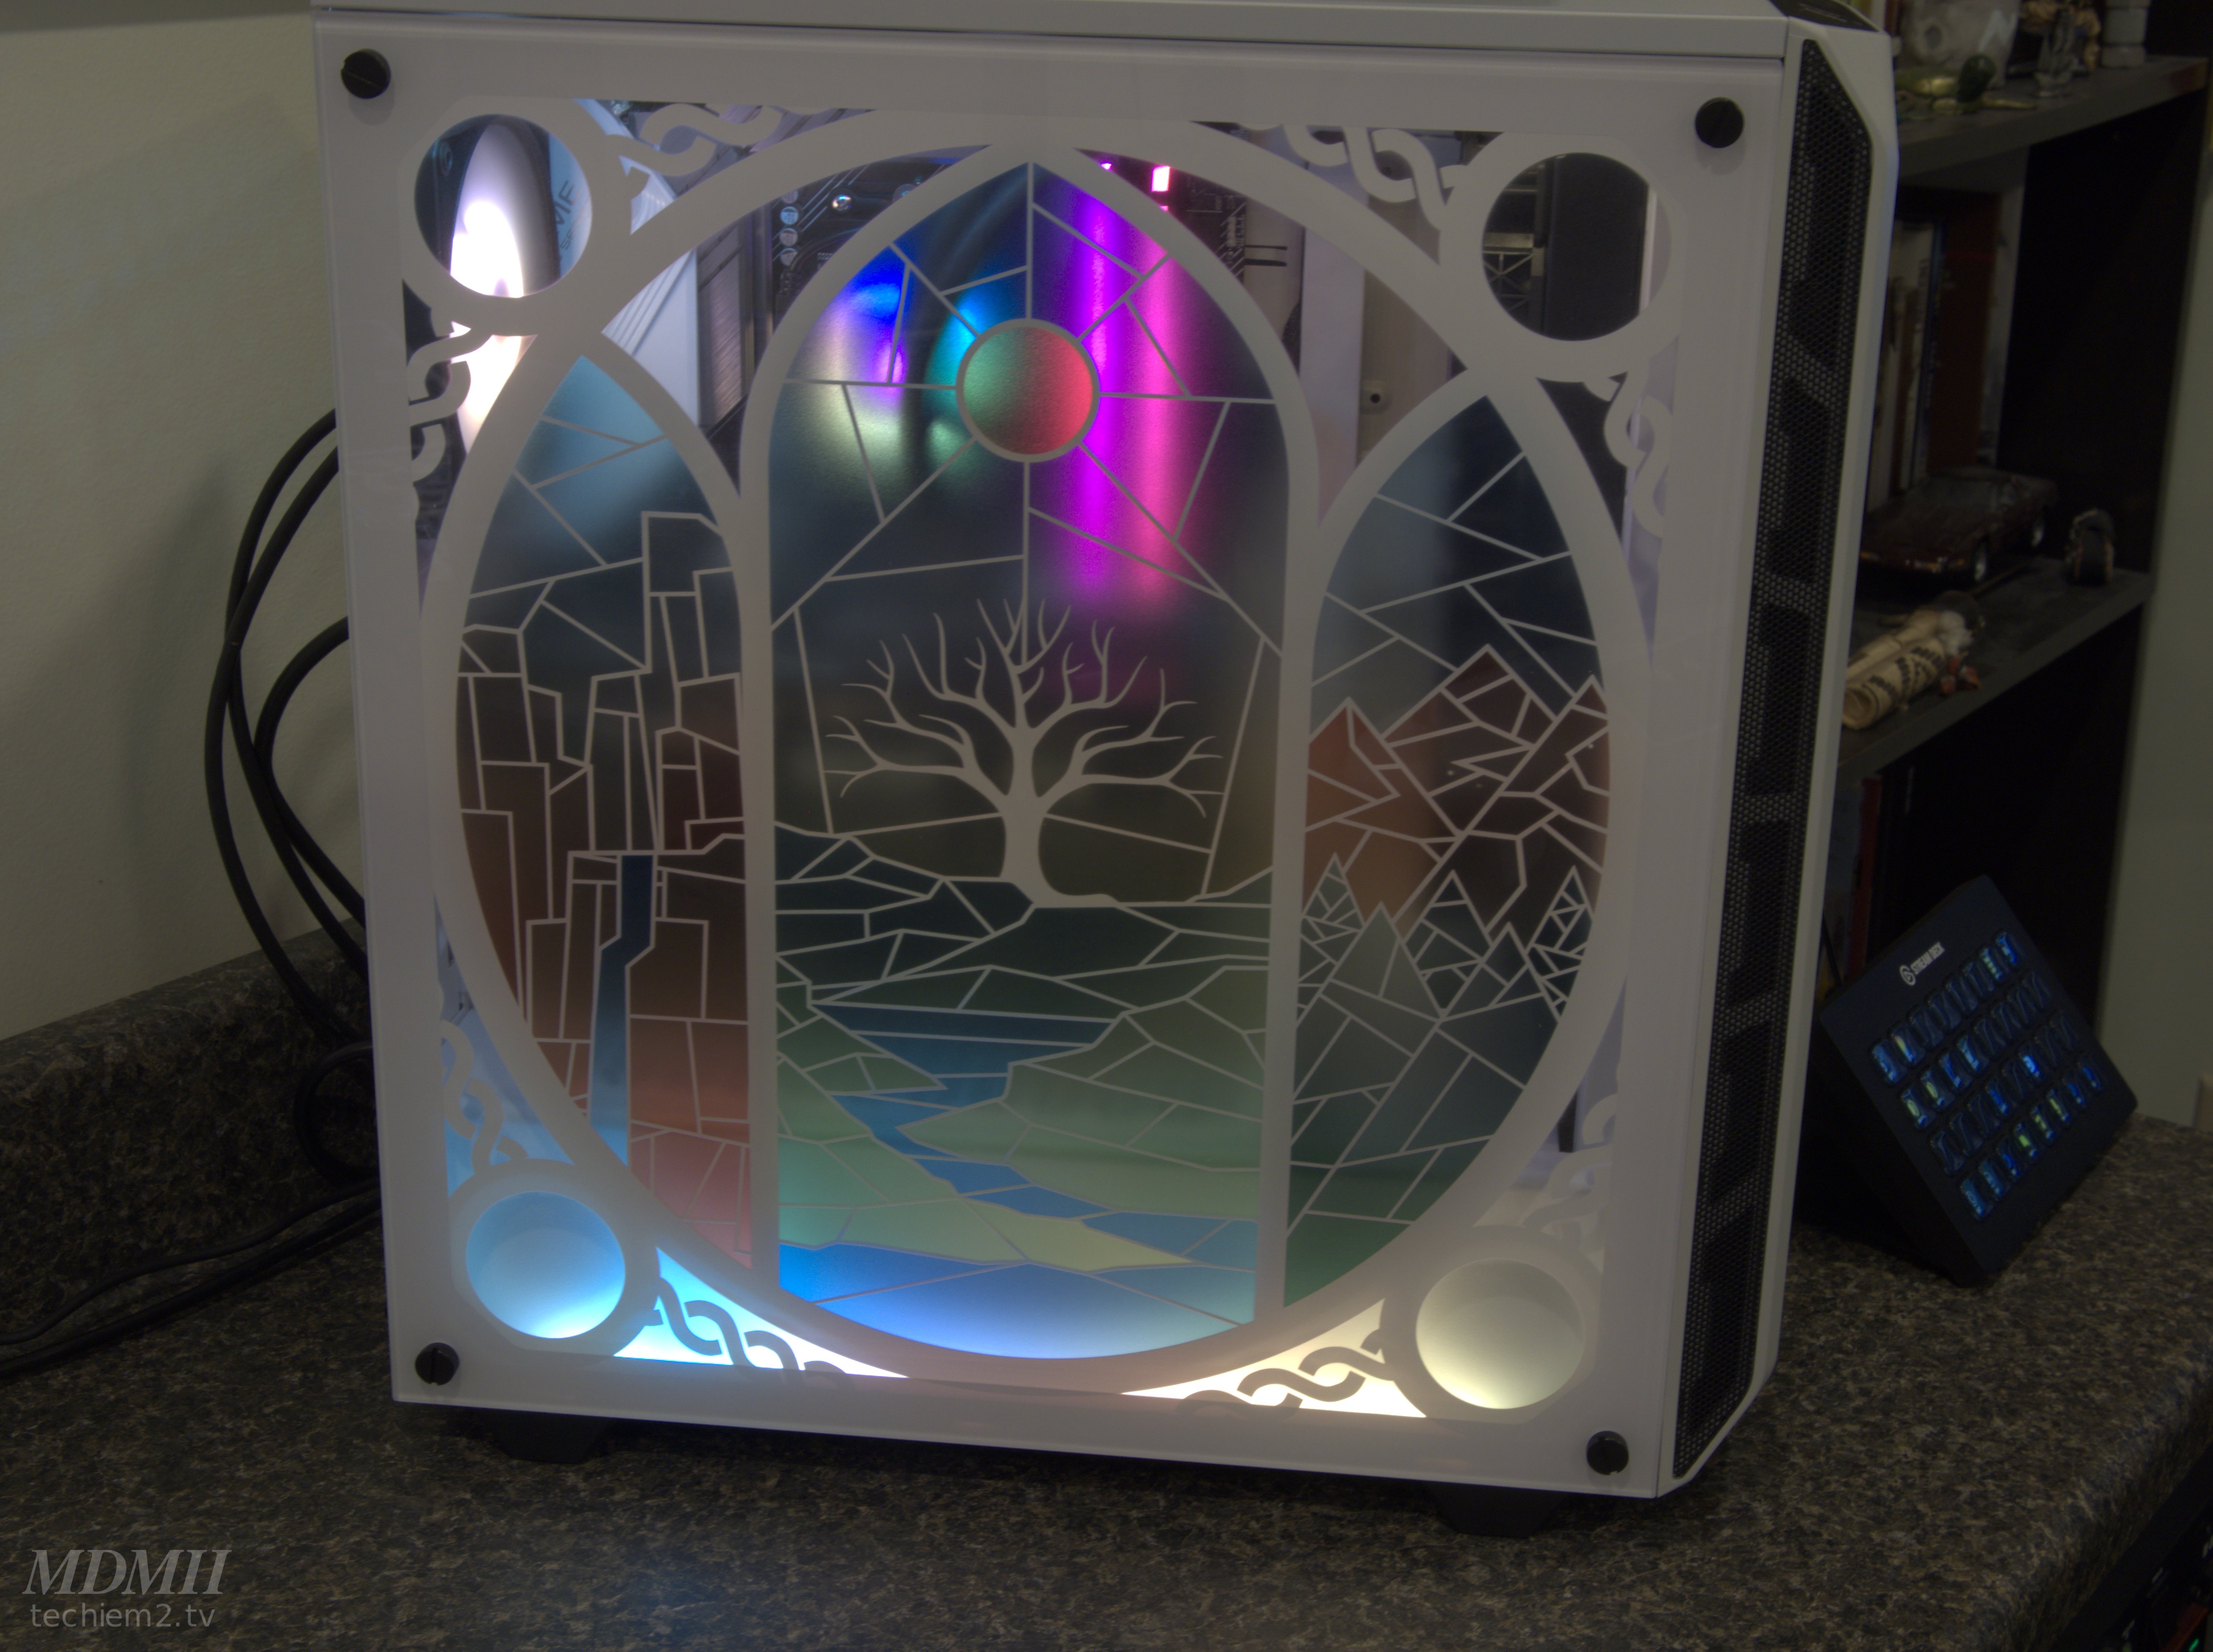
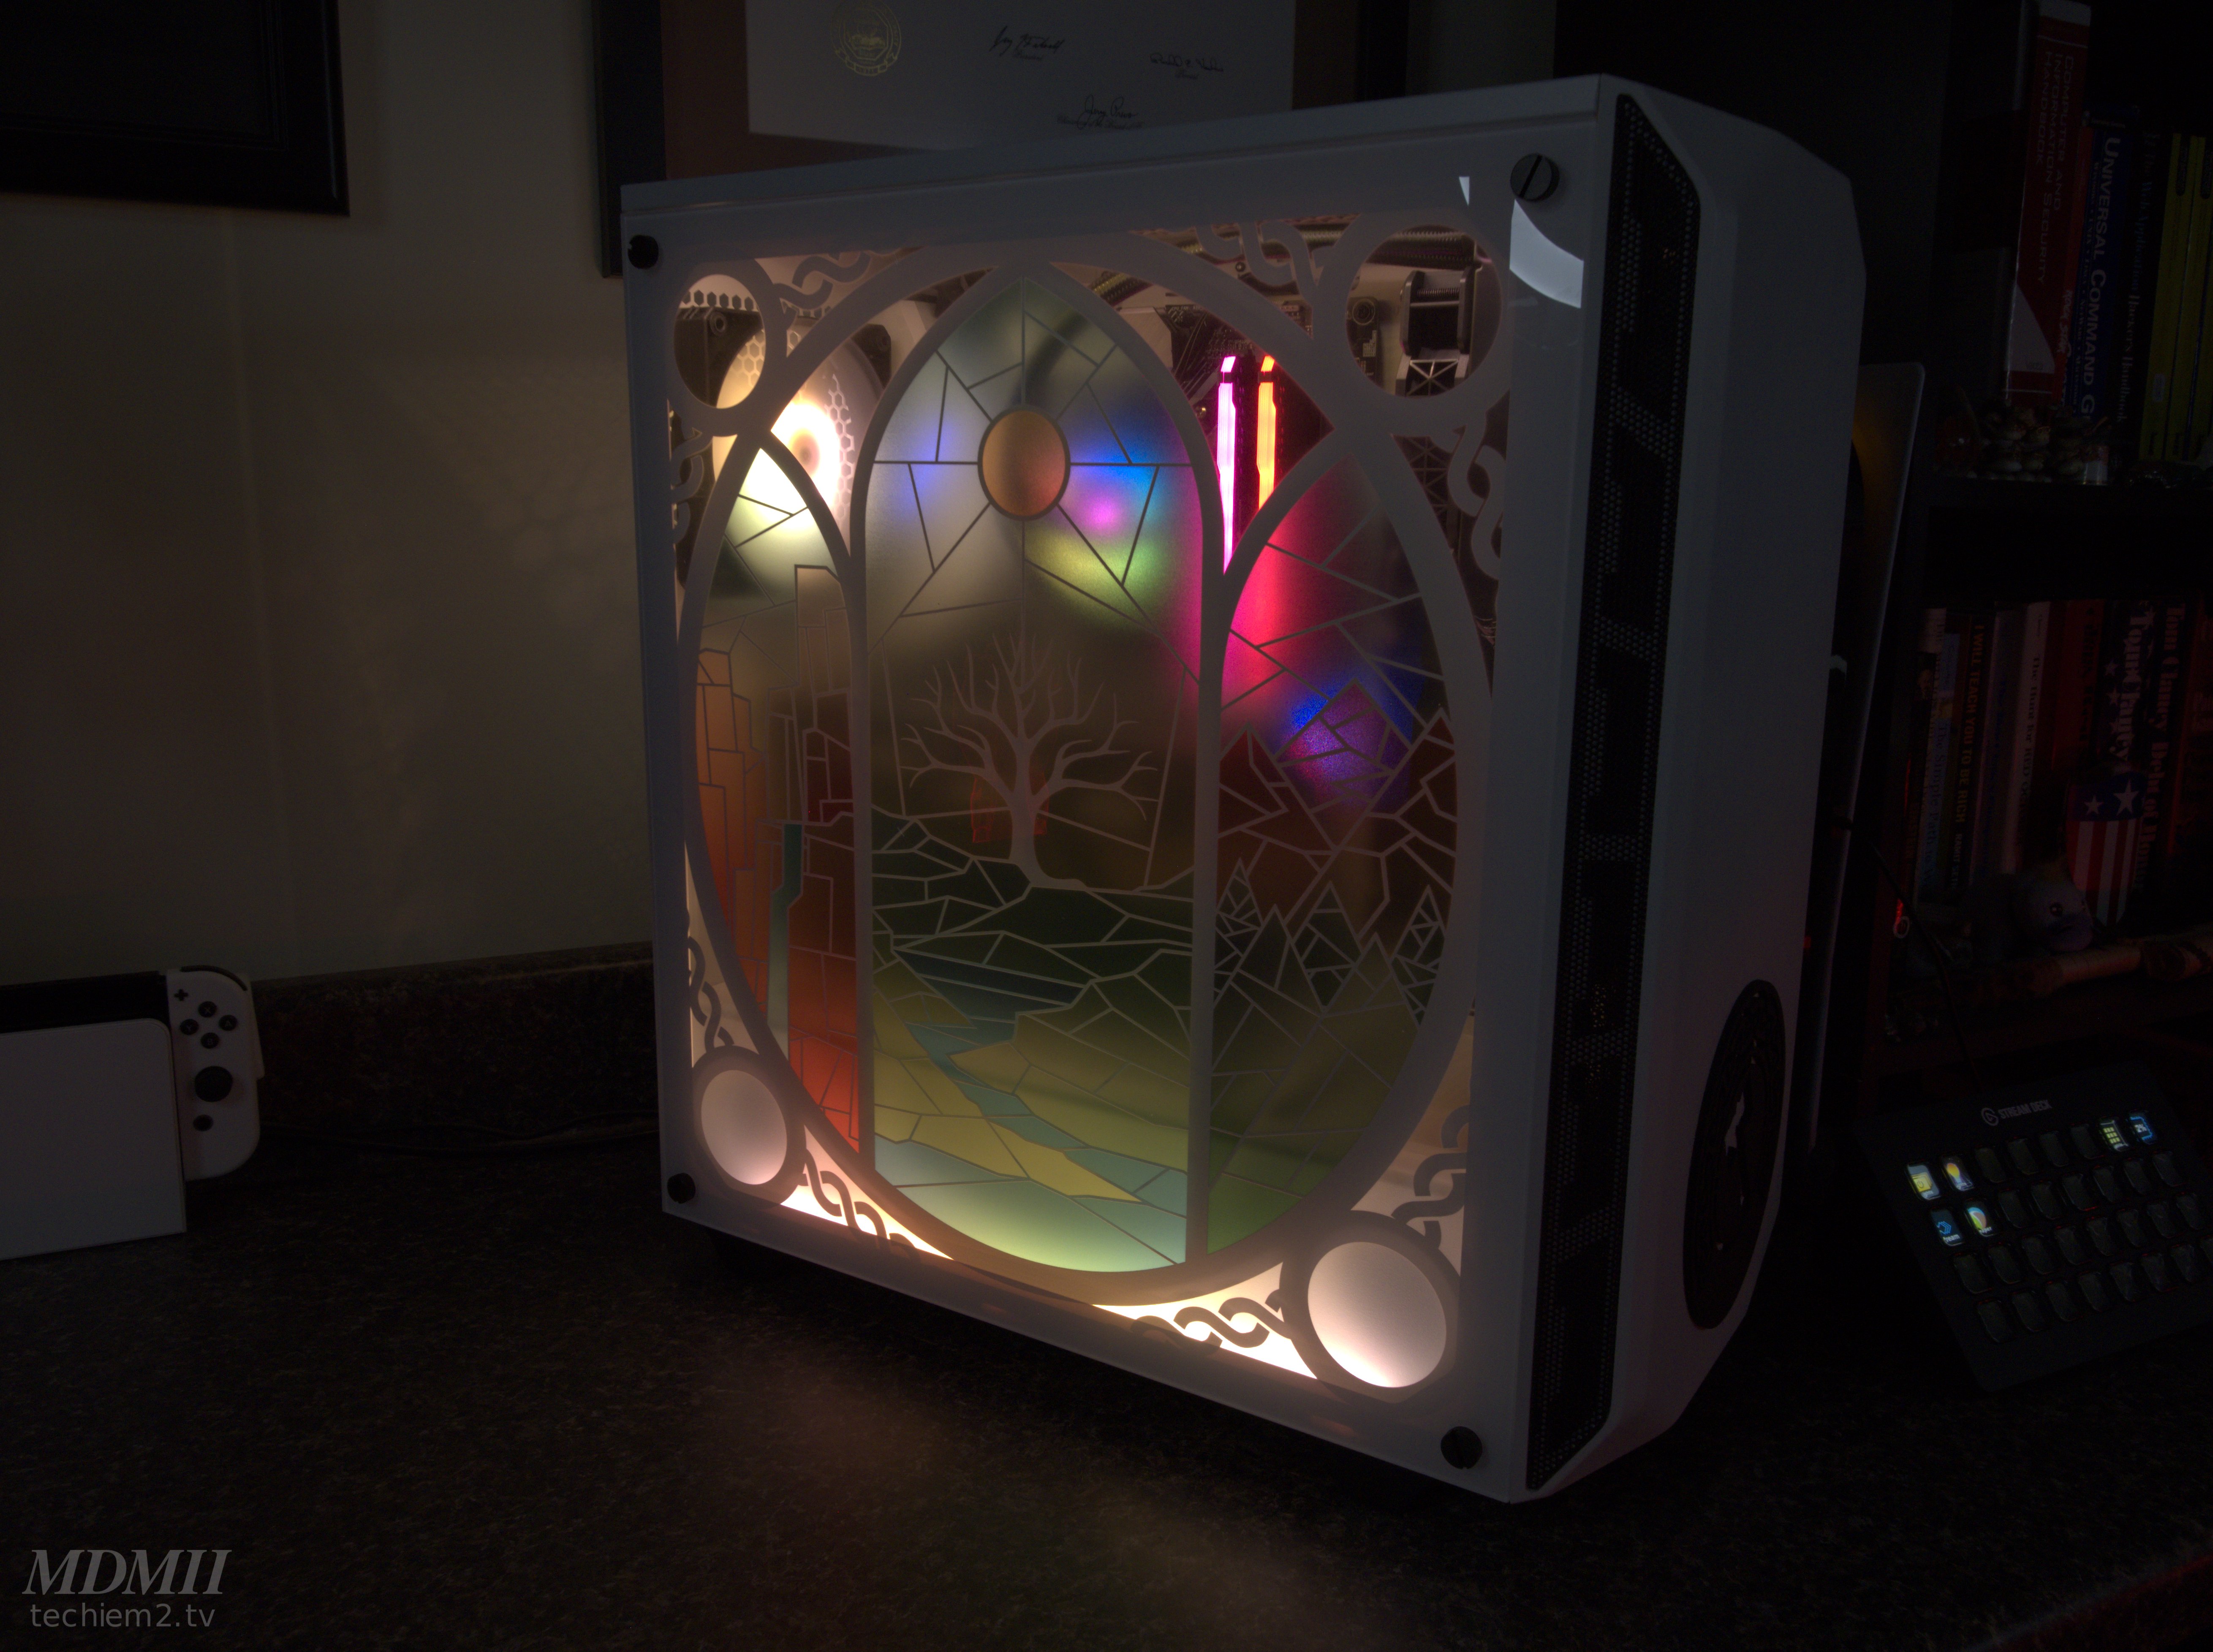
Ironside Yggdrasil (Limited Edition Gaming PC)
Asus Prime x570-pro
AMD Ryzen 7 5800X
Corsair Vengeance RGB PRO 32GB (2x16GB) DDR4 3600
1TB NVME
4TB Seagate HDD
Nvidia GeForce RTX 3060 ti 8gb
Ironside Yggdrasil Case
Be Quiet! 750w 80+ bronze
Corsair H100i RGB PRO XT Cooler
Streaming/Production PC
Media Cougar (Self-Built Streaming/Production PC)
Asus ROG STRIX B550-F Gaming
Ryzen 5 5600G
Crucial Ballistix 16GB (2x8GB) DDR4 3200
Crucial P2 500GB M.2-2280 NVME
Cougar MX330-G Mid Tower Case
be quiet! Pure Power 11 CM 600W 80+ Gold
Elgato 4K60 Pro MK.2
Elgato Facecam x 3
Elgato Stream Deck XL
NVidia GeForce GTX 770 (from old workstation/old old gaming PC)
Workstation
Asus ROG GR8 II (old gaming PC)
Used for Photo Editing, Video Production, and general everyday use.
PC Input Devices
All PCs have a Ducky Shine 5 mechanical (Cherry MX Reds) keyboard and Logitech G900 Chaos Spectrum mouse.
Workflow/Tools
Audio Production
Audio Recording and Editing is done using Reaper on the Streaming/Production PC.
Video Production
Studio, Streaming, and direct capture video recording is done using OBS on the Streaming/Production PC.
Other video recording is done using my Atomos Ninja V hooked up to my Olympus OM-D E-M1 Mark III camera.
Editing is done using Openshot on the Workstation PC.
Streaming
Streaming is handled by OBS on the Streaming/Production PC.
I use the StreamElements plugin and the PolyPop app. I have used Restream to send to both both Twitch and YouTube on occasion.
I have 6 primary scenes configured:
Starting Soon - A picture with an audio loop
Game - Uses the Elgato 4K60 Pro MK.2 as the video/audio capture source, Facecam for face, and the Sparks for voice
Studio - Facecam for video, the Theremini (via Scarlett audio source) for audio, and the Sparks for voice
Just Chatting - Defaults to Facecam for video, has all video sources available to switch between, and the Sparks for voice
BRB - A picture with an audio loop.
Streaming Ending - A Picture with an audio loop
The sparks are the 2 channels of a single stereo audio source.
I am currently using a single OBS audio source for both scenes using the mics.
I have the source configured as mono so both mics will mix to both channels in the stream.
This is an important point. If you don’t set the source to mono, the mic being picked up will only be heard on the channel it is on on the interface - Left or Right.
Mono mode in OBS mixes both source channels to both output channels, so no matter which mic is active you will get it on both channels.
I could make 2 audio sources to fully separate the mics for the scenes (I have tested this and it works), but I don’t currently see a reason to do that because of how the pickup of the mics works and their locations.
Photo Editing
Photo processing and editing is done using Darktable and Gimp on the Workstation PC.
Hardware/Software Controls
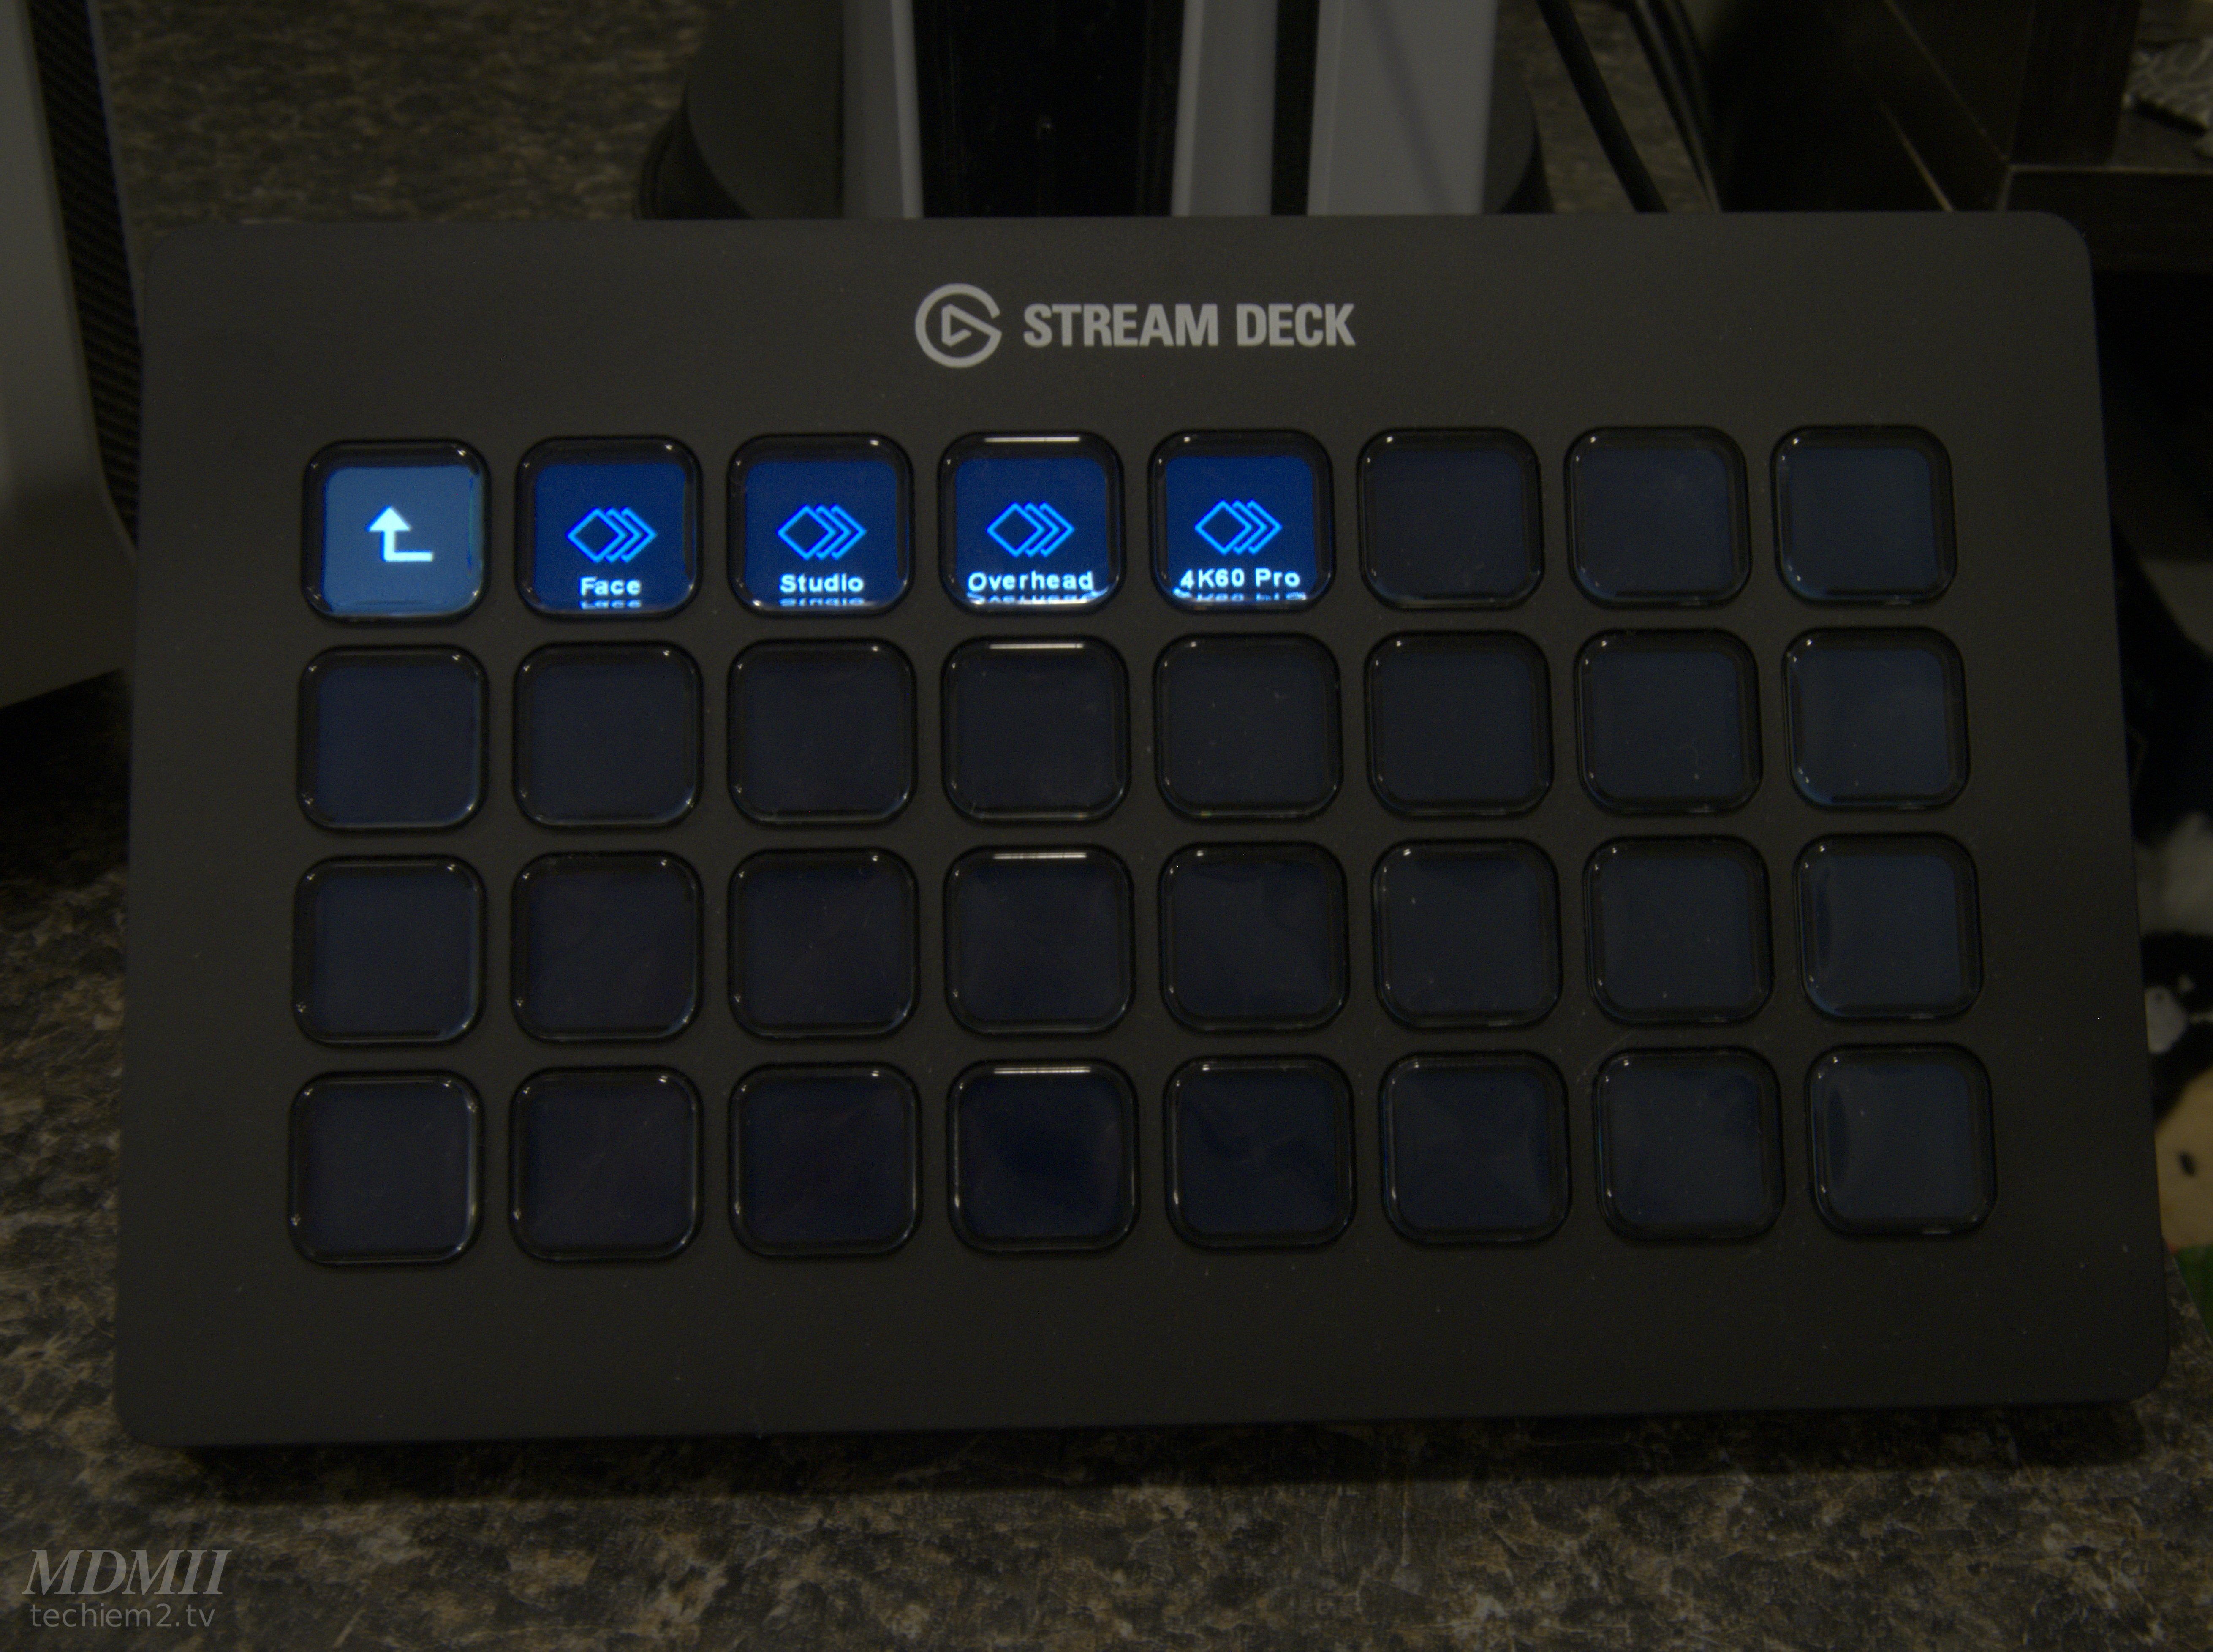
Most control of my HDMI Matrix Switch, lighting, and streaming is done using an Elgato Stream Deck XL with accompanying software.
Stream Deck Configuration
Stream Deck Plugins
Stream Deck Plugin
Control Center Plugin
OBS Studio Plugin
Custom - CPU Plugin
Advanced Launcher Plugin
Stream Deck Buttons
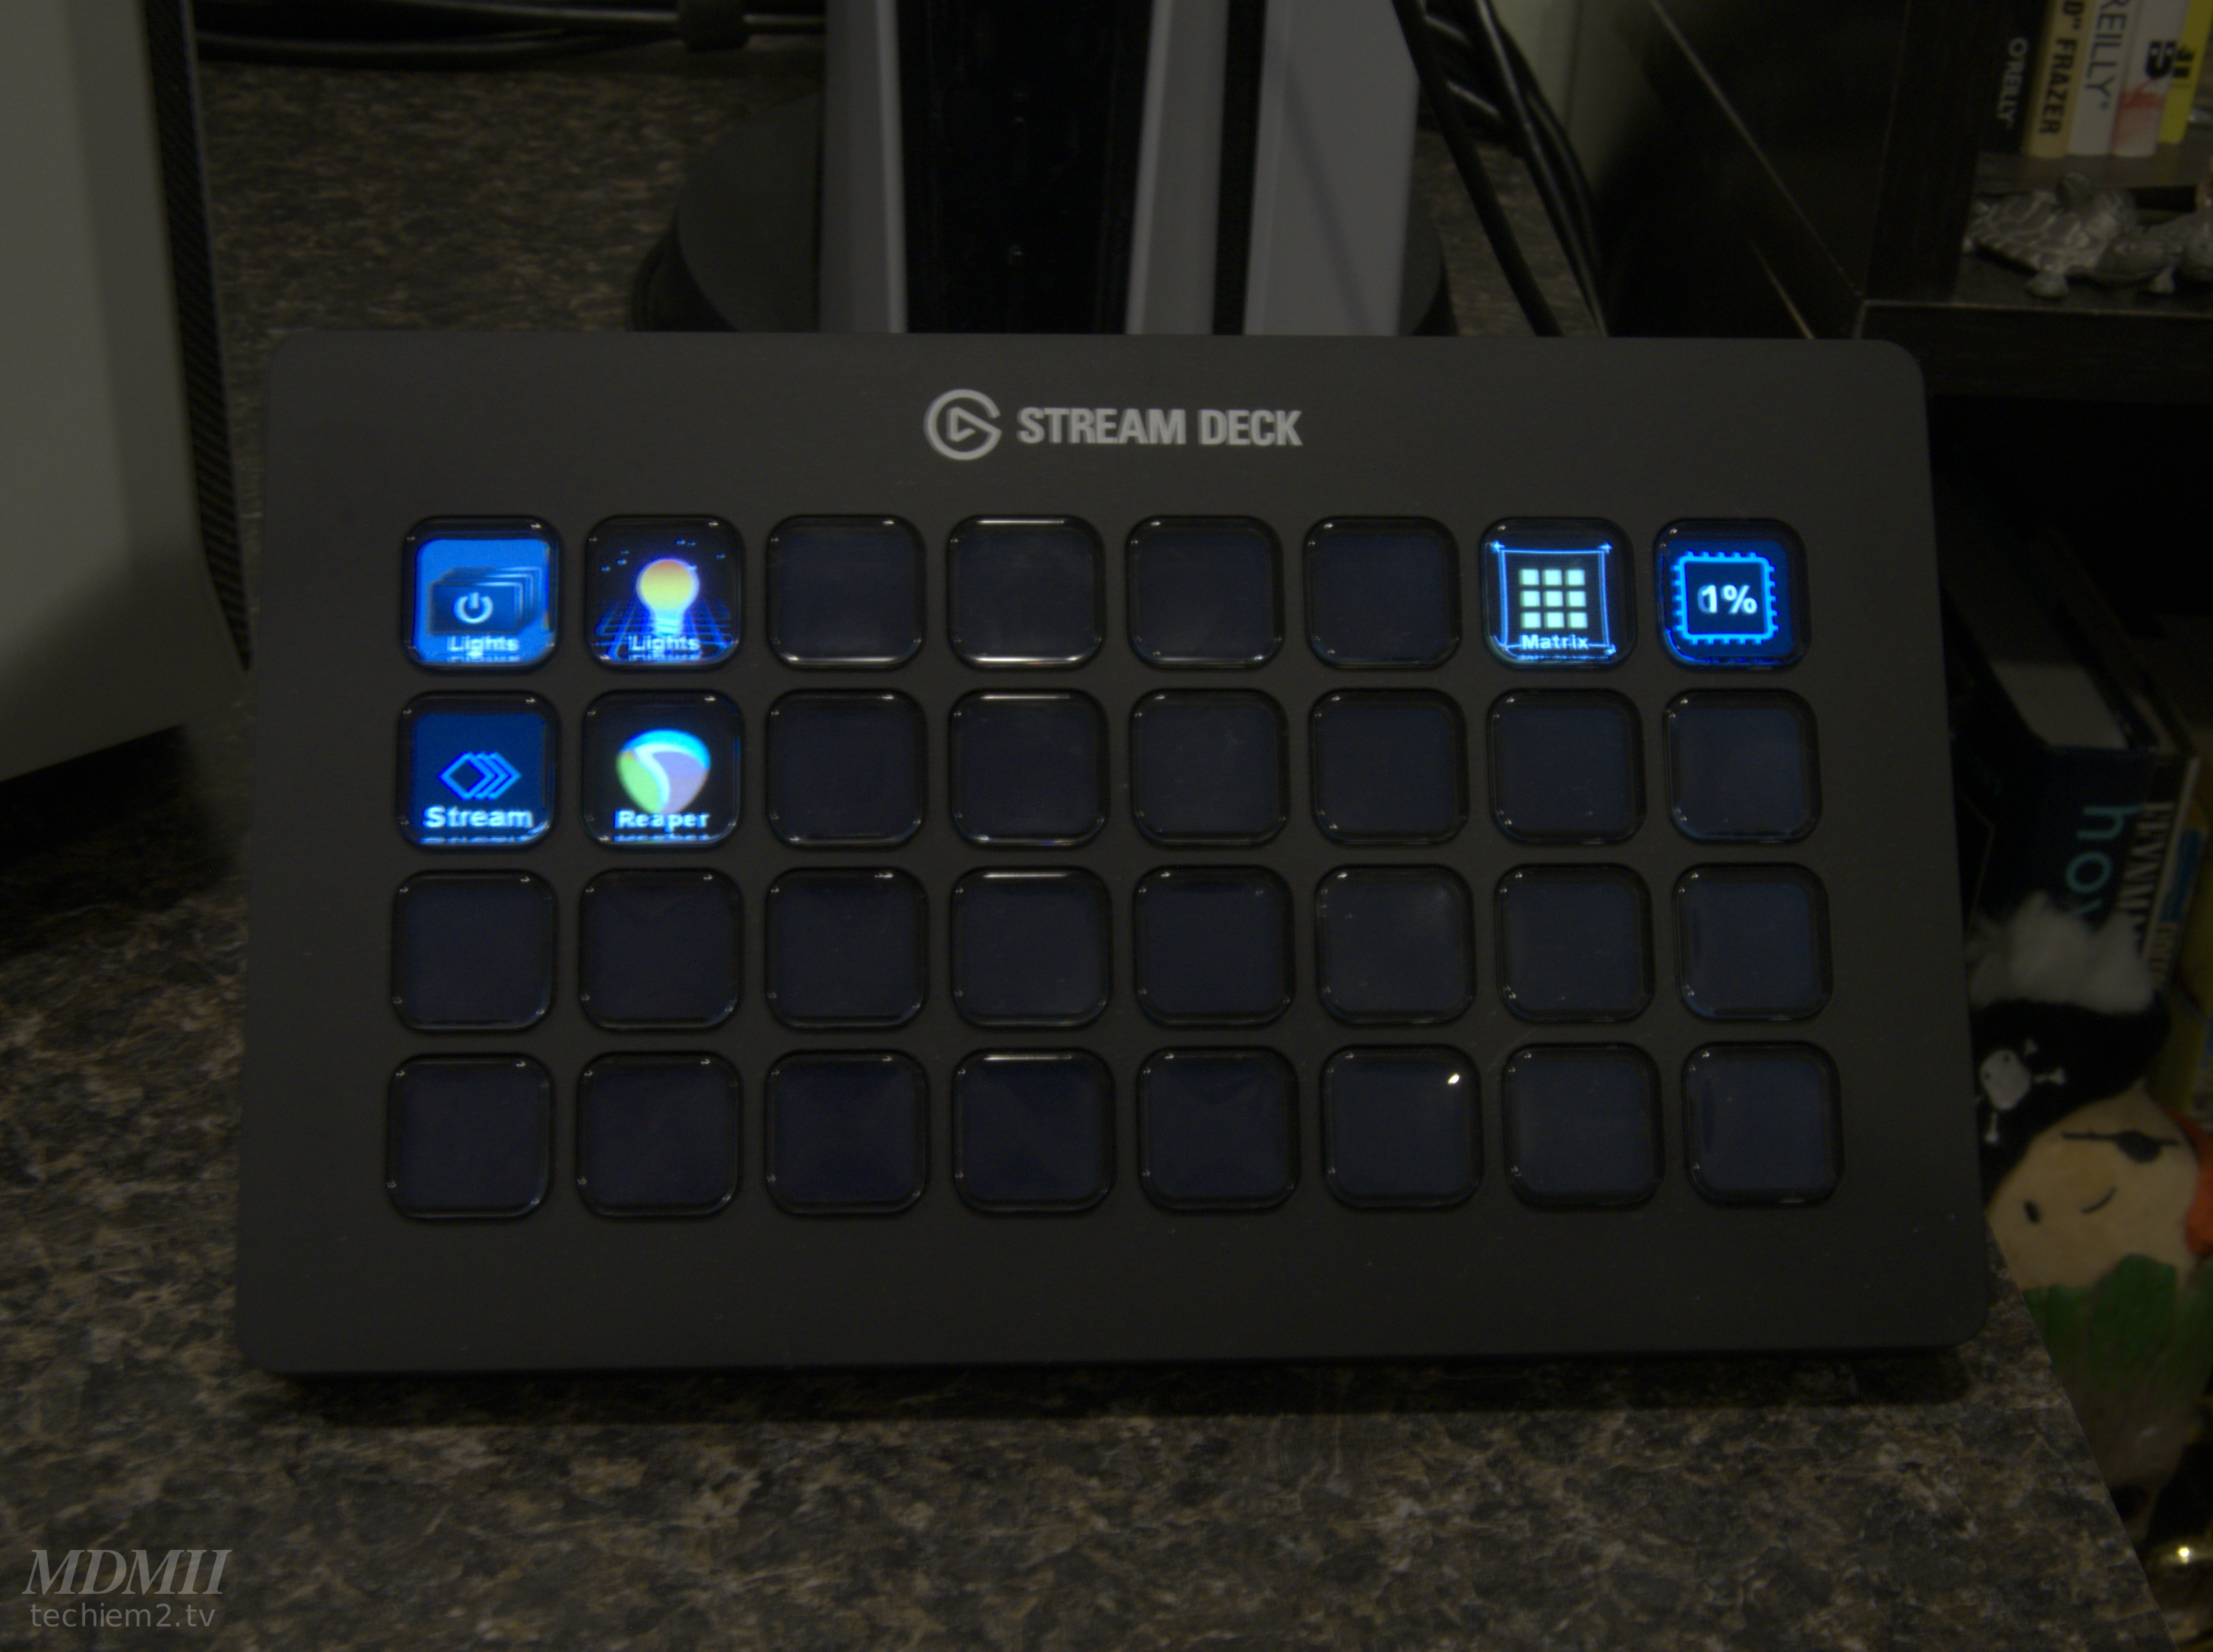
Main Profile
Lights - Turn all Elgato Lights On/Off
Lights (Folder)
- White - Sets color of under desk Light Strip
- Red - Sets color of under desk Light Strip
- Green - Sets color of under desk Light Strip
- Blue - Sets color of under desk Light Strip
- Purple - Sets color of under desk Light Strip
- Defaults - Sets all lights to my default settings
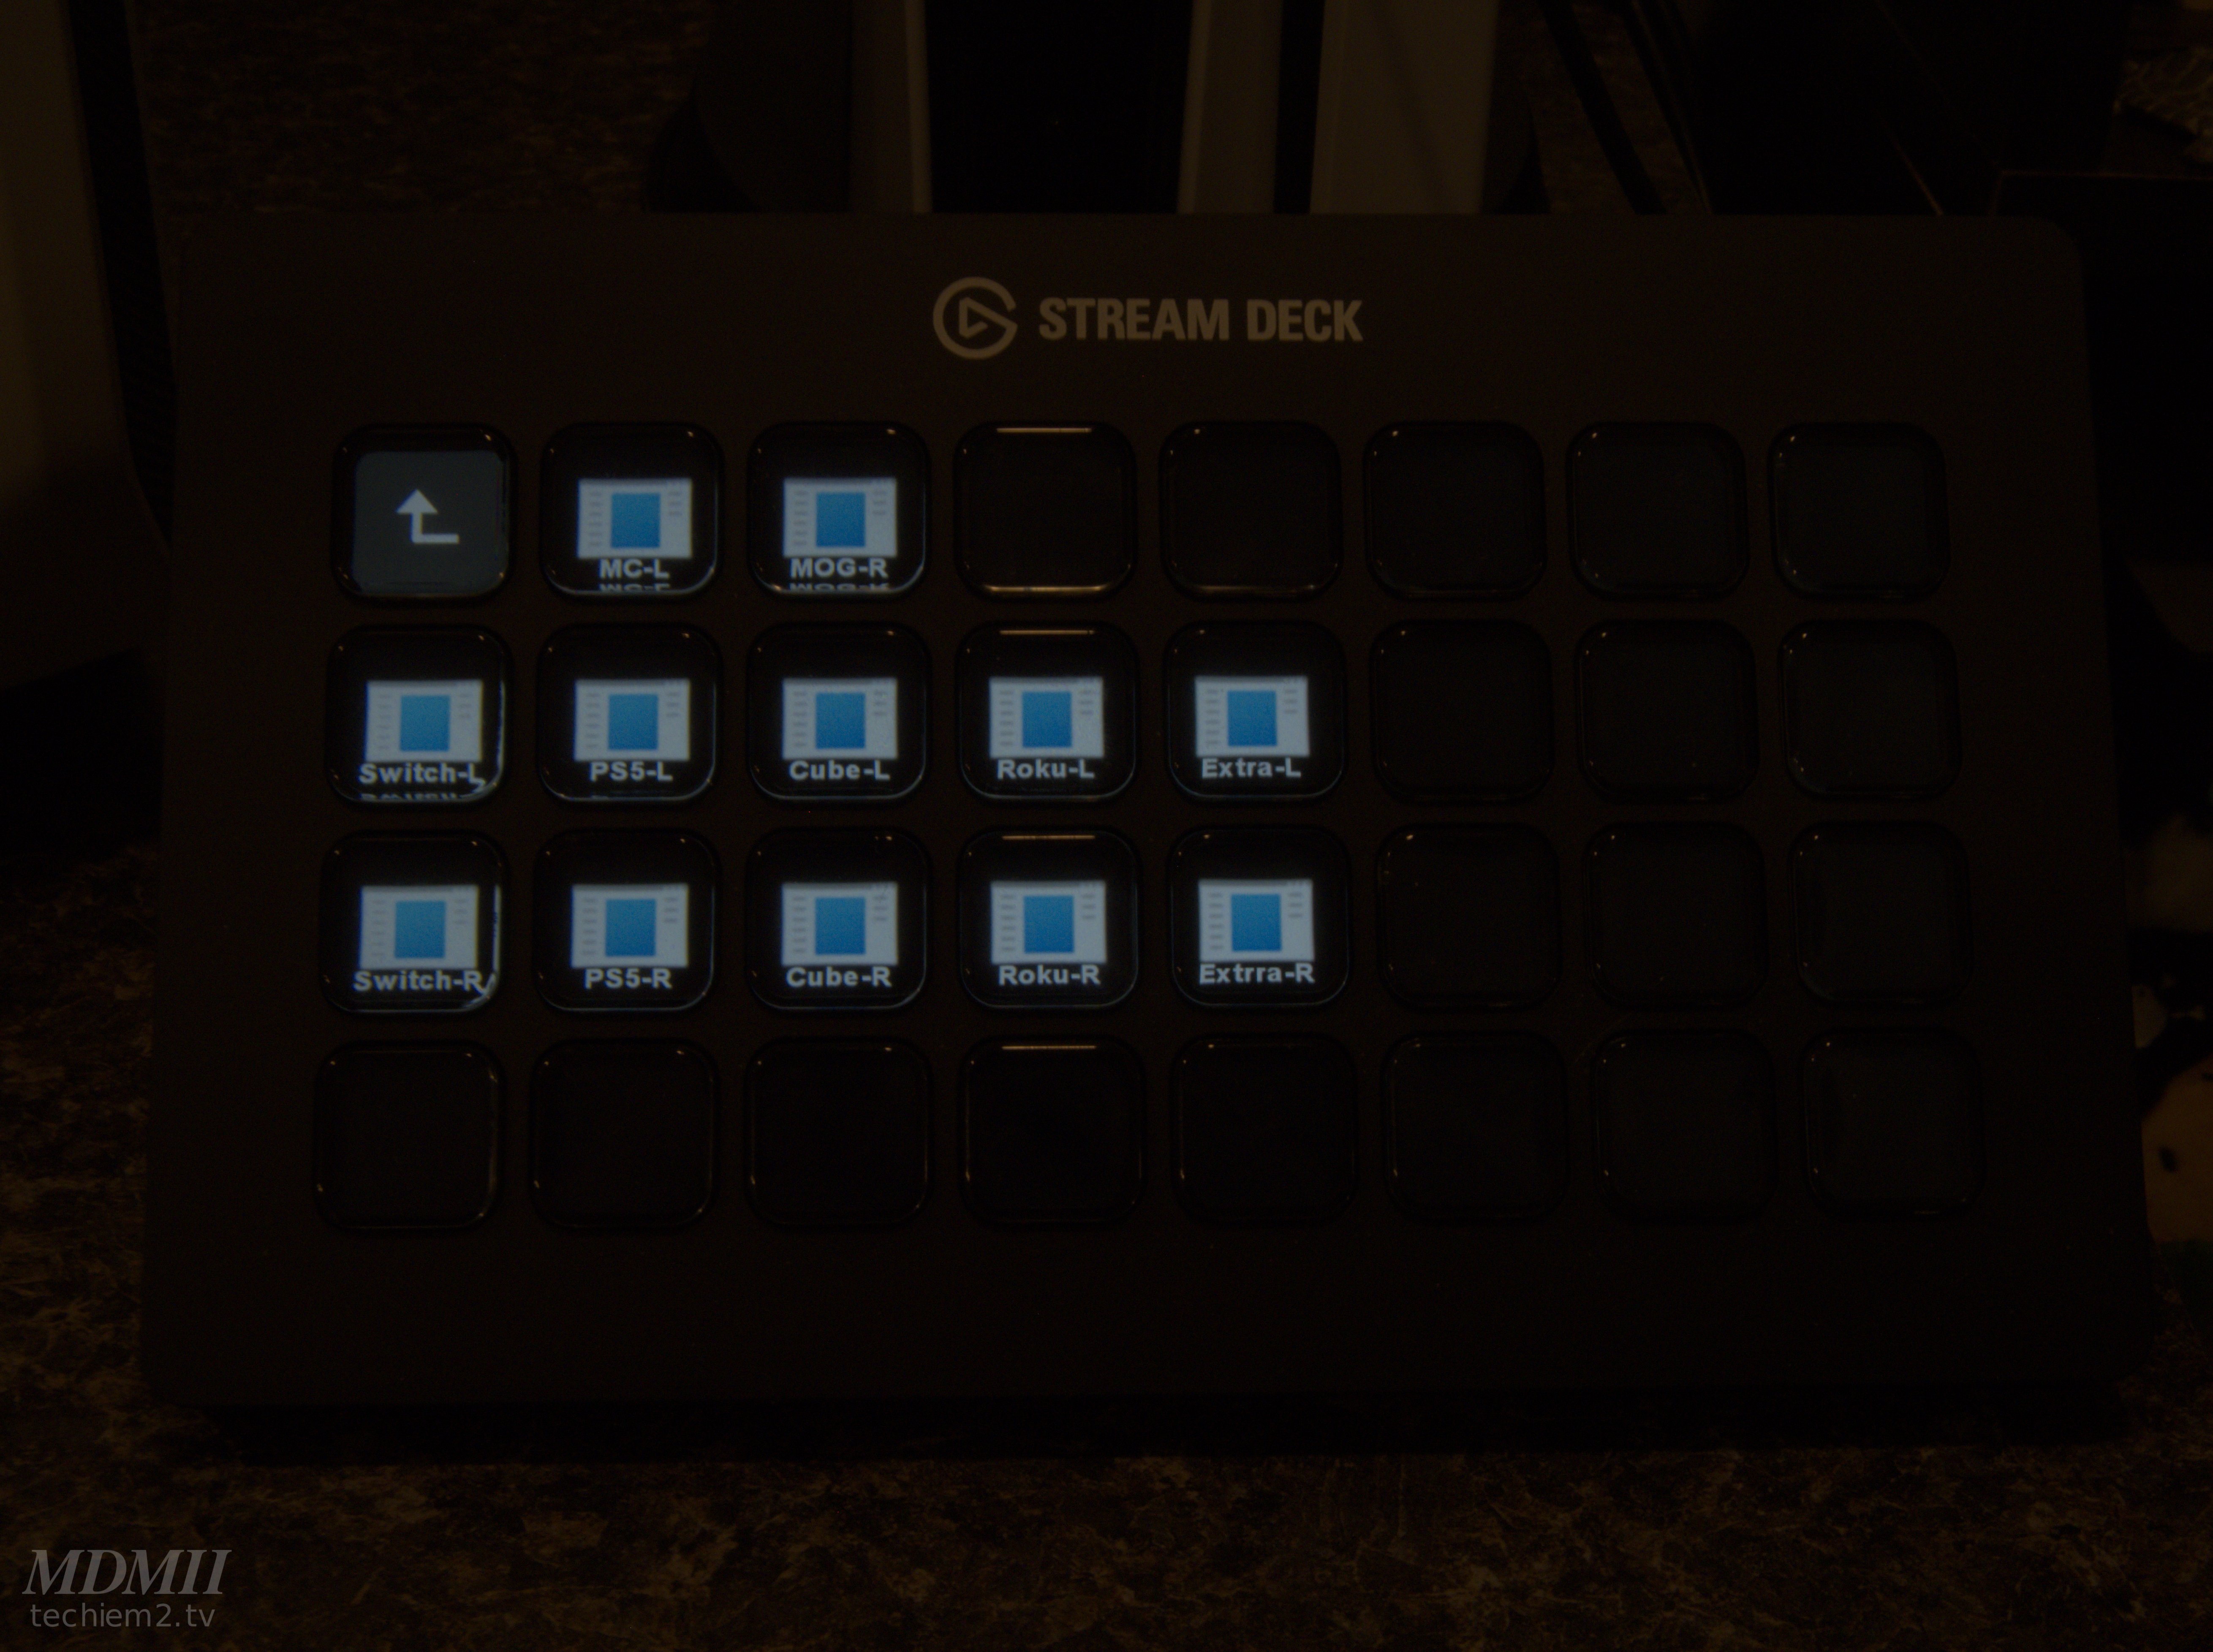
Matrix (Folder)
- MC-L - Send Streaming/Production PC Output 1 to Monitor 1 (default)
- MOG-R - Send Gaming PC Output 1 to Monitor 2 (default)
- Switch-L - Send Switch to Monitor 1
- Switch-R - Send Switch to Monitor 2
- PS5-L - Send PS5 to Monitor 1
- PS5-R - Send PS5 to Monitor 2
- Cube-L - Send Fire Cube to Monitor 1
- Cube-R - Send Fire Cube to Monitor 2
- Roku-L - Send Roku to Monitor 1
- Roku-R - Send Roku to Monitor 2
- Extra-L - Send Temporary to Monitor 1
- Extra-R - Send Temporary to Monitor 2
CPU Usage - Displays CPU Usage
Stream (Multi Action) - Launches Polypop and OBS
Reaper - Launches Reaper
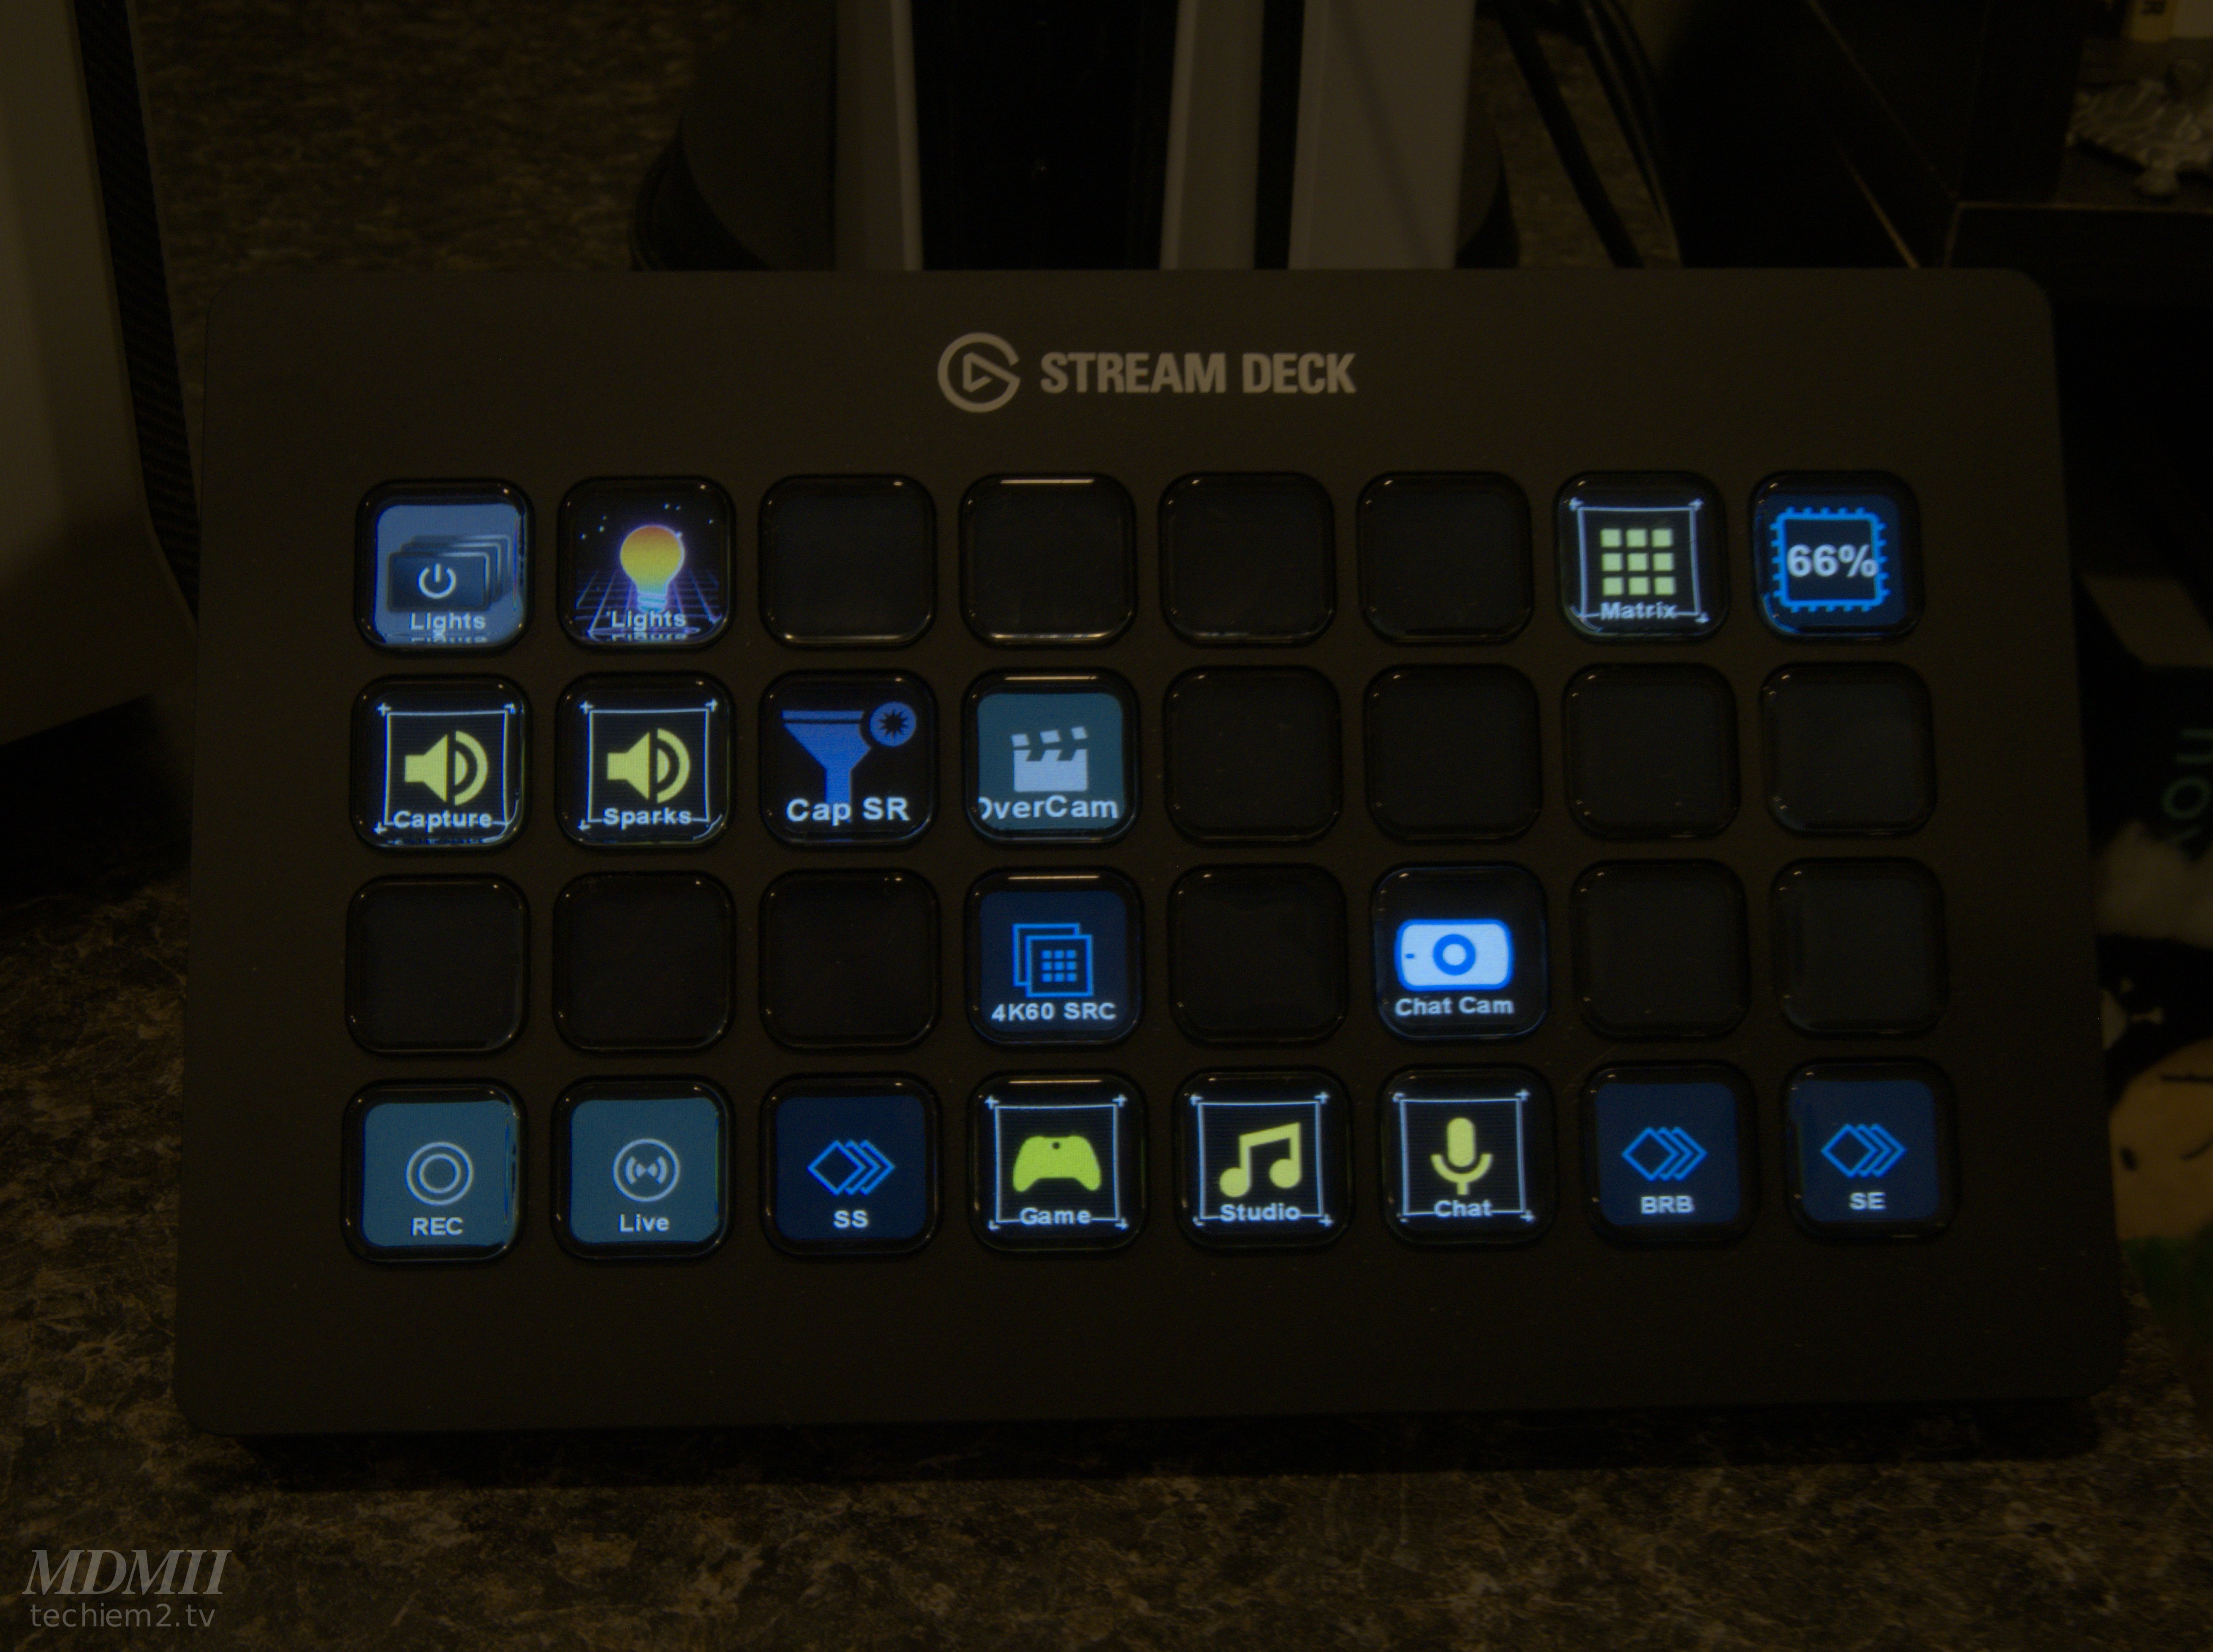
OBS Profile
Lights - Same as Main Profile
Lights (Folder) - Same as Main Profile
Matrix (Folder) - Same as Main Profile
CPU Usage - Same as Main Profile
Capture (Mute/Unmute) - Mute/Unmute 4k60 audio
Sparks (Mute/Unmute) - Mute/Unmute Sparks
Cap SR - Start/Stop Source Record plugin on 4k60
Overcam - Hide/Unhide Overhead Cam source in Game Scene
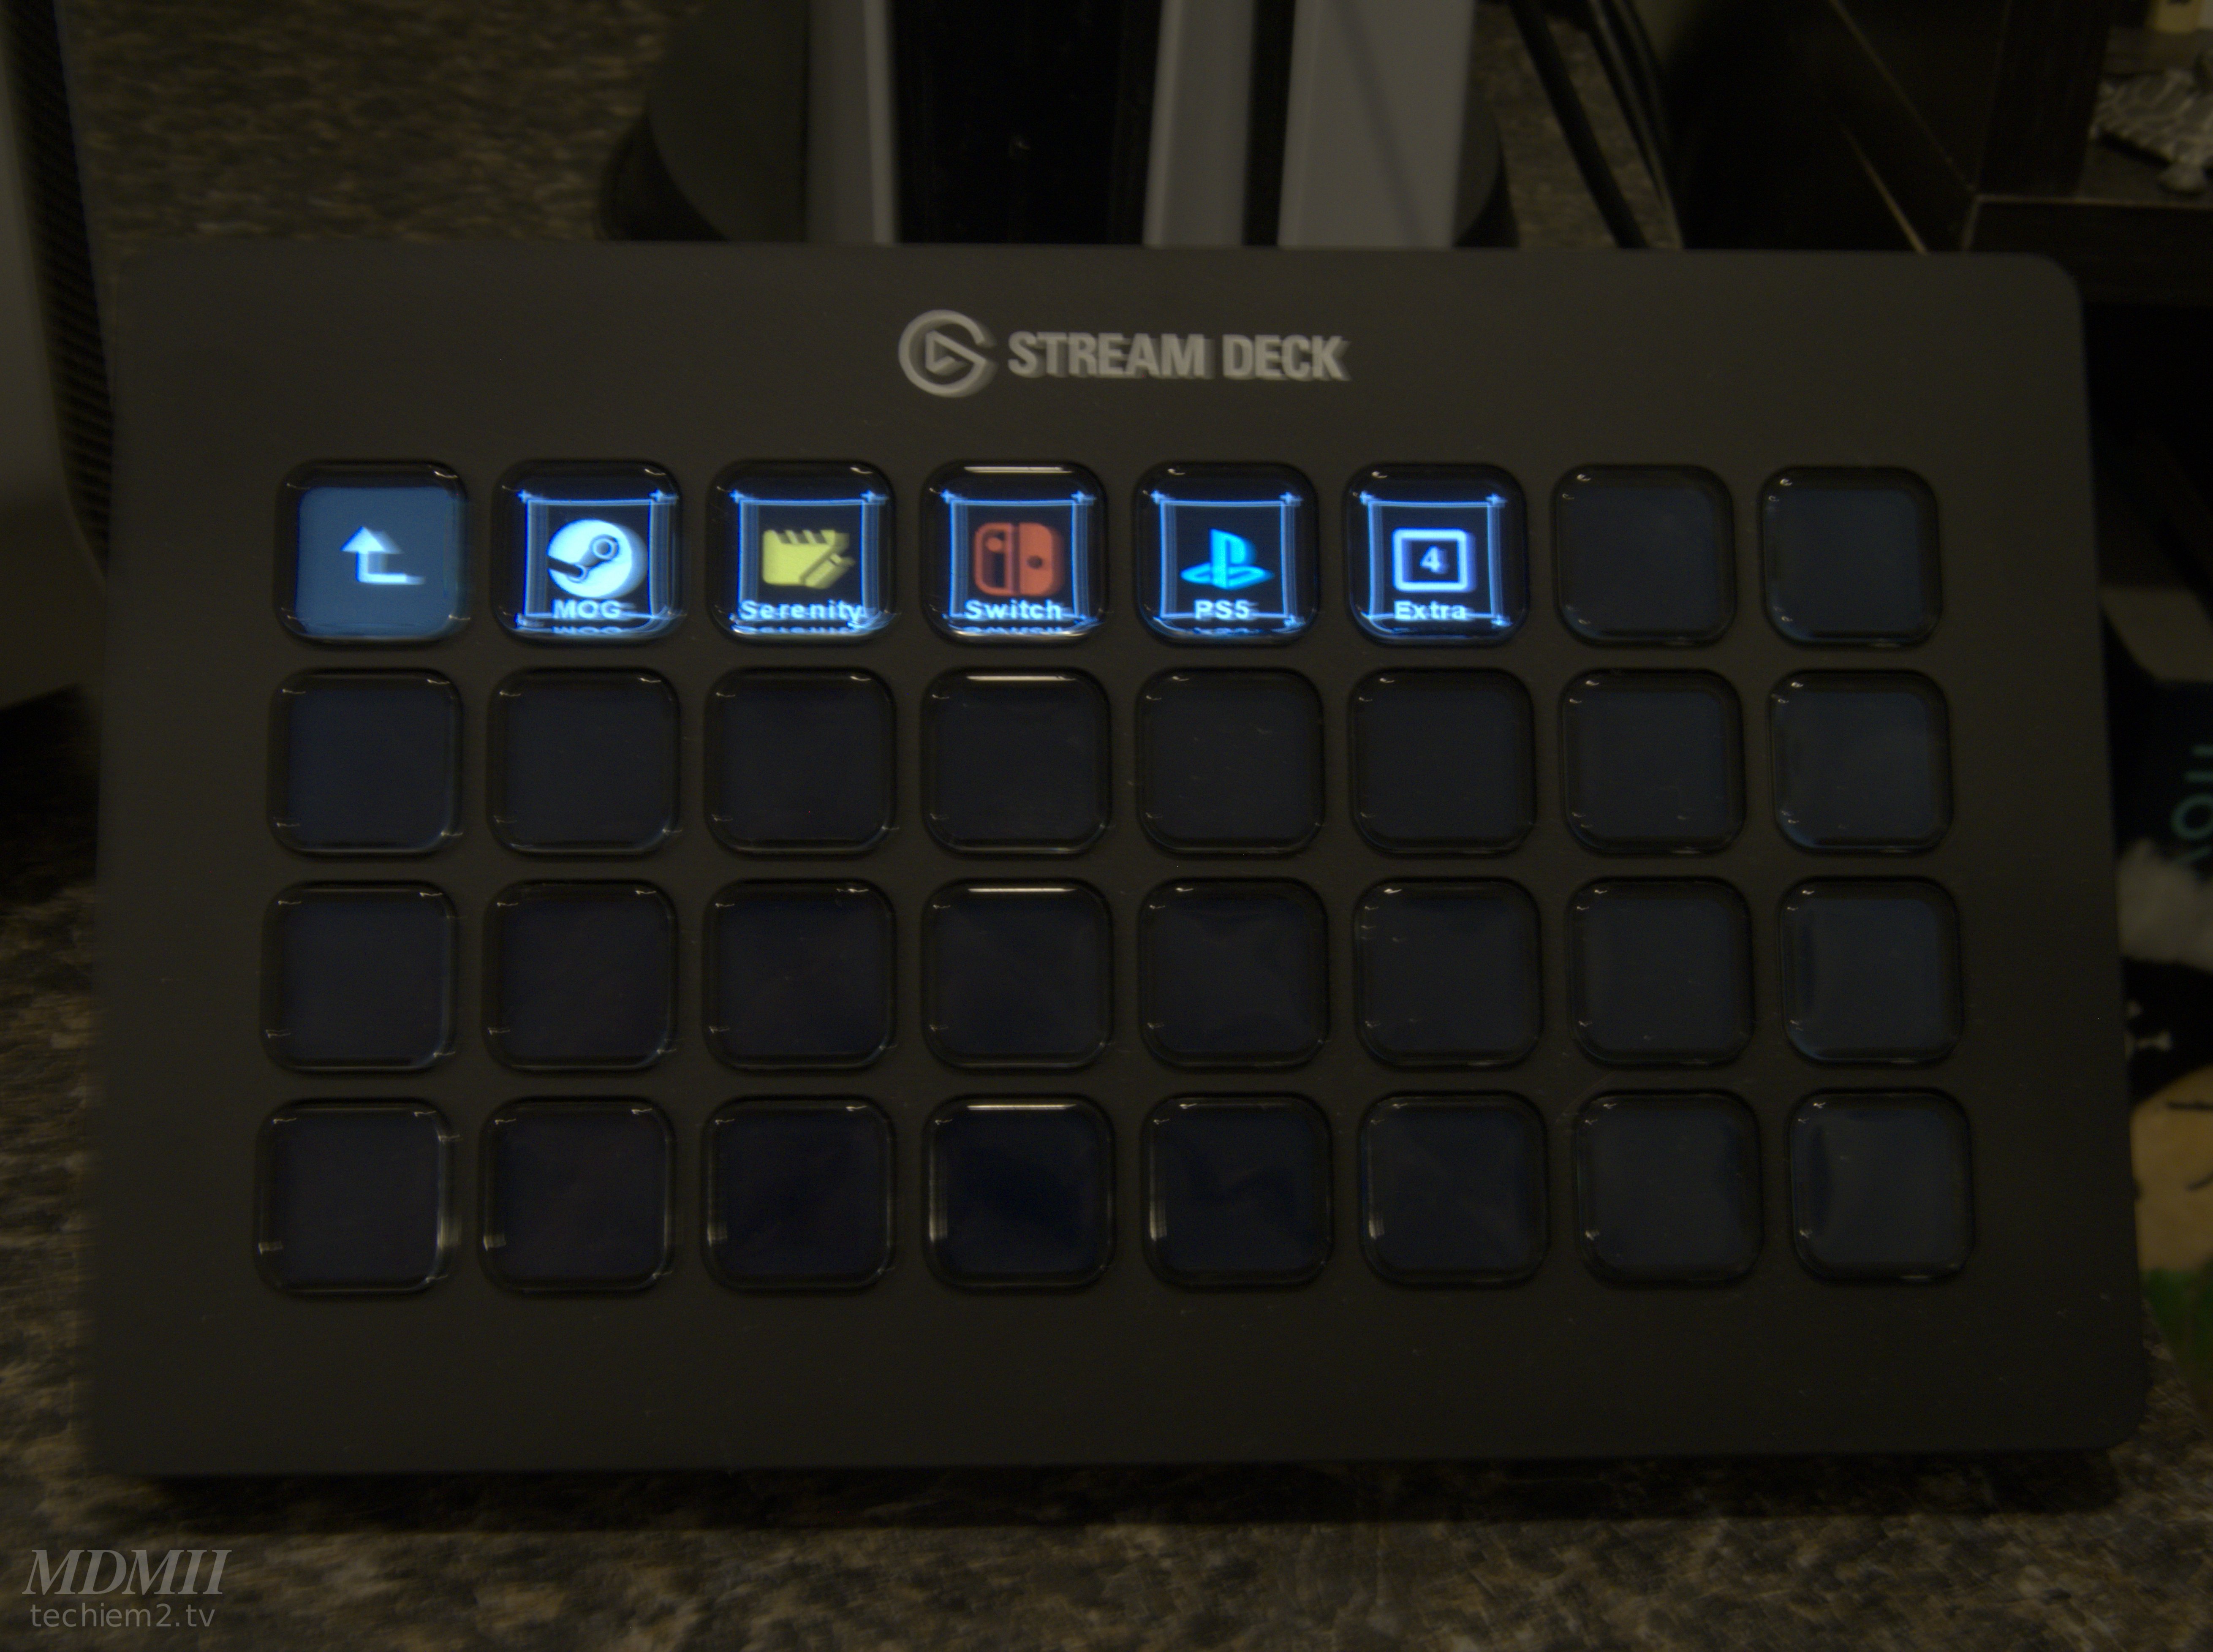
4k60 SRC (Folder)
- Matrix Switch Commands to switch capture source
Chat Cam (Folder)
- Multi Action buttons to switch which camera is live in Just Chatting Scene
REC - Start/Stop Recording
Live - Start/Stop Streaming
SS (Multi Action)
- Sets brightness levels on Ring Lights
- Switches OBS to the Starting Soon Scene
Game (Multi Action)
- Sets brightness levels on Ring Lights
- Switches OBS to the Game Scene
Studio (Multi Action)
- Sets brightness levels on Ring Lights
- Switches OBS to the Studio Scene
Chat (Multi Action)
- Sets brightness levels on Ring Lights
- Switches OBS to the Just Chatting Scene
BRB (Multi Action)
- Sets brightness levels on Ring Lights
- Switches OBS to the BRB Scene
ES (Multi Action)
- Sets brightness levels on Ring Lights
- Switches OBS to the Stream Ending Scene
Advanced Launcher Configuration for HDMI Matrix Switch
The HDMI Matrix Switch has network control capabilities.
It has a web interface as well as support for raw TCP commands.
I use the Advanced Launcher plugin to run the Packet Sender tool in command line mode to control the HDMI Matrix Switch.
A note for people using a similar HDMI Matrix Switch:
- There are older and newer versions of the switch, with differing firmware.
- The newer version of the switch is identified by the ADVANCED label on the front.
- The older version uses UDP instead of TCP and has a different command set.
- Shout out to the awesome support folks at No Hassle AV who helped me out with this when I emailed on a holiday weekend trying to figure out why the UDP commands were not working!
The switch listens on TCP port 8000 for ASCII commands
To control input/output routing the command is as follows:
s in [input 1-8] av out [output 1-8]!
Example:
s in 2 av out 8!
This sends input source 2 (Gaming PC output source) to output 8 (the Atomos Connect 4k)
So in this setup the Application field in the Advanced Launcher plugin is set to the full path to packetsender.com (the command line executable), and the Arguments field is set to the appropriate command for the button.
Example:
-taqw 500 192.168.100.4 8000 “s in 2 av out 8!”
t: TCP
a: ASCII Mode
q: Quiet Mode
w 500: Wait 500ms for response
192.168.100.4 8000: IP and Port of HDMI Matrix Switch
“s in 2 av out 8!”: Command to send
My only complaint is that Advanced Launcher doesn’t have an option to run the commands silently in the background, so you just need to be aware that if you stream from your Gaming PC and hit one while in a game, it will likely switch you back to the desktop when the command prompt window opens to run the Packet Sender command, so don’t switch sources in the middle of a boss fight (All the more reason to use a 2-PC setup like this for streaming)!